Frequently Asked Questions
Frequently Asked Questions
There are a number of items that are frequently requested through the help desk. These pages are an effort to group these frequently asked questions in a way that makes them easily accessible.
10 most frequently asked questions about PCR-360
How do I set up a Coordinator?
Before setting up a Coordinator, we need to define their meaning in PCR-360. In PCR-360, a Coordinator is the person or persons responsible for the Bill for a particular Department. Coordinators see the Services, Equipment and Billing for the whole Department. If Services and Equipment are Owned by individual Contacts, the Coordinator sees all the Services and Equipment owned by the Contacts if the Contacts have a Department set in the Customer tab of the Worker / Contact. The Coordinator sees the Billing for the whole Department.
There are three separate components to properly set up a Coordinator.
Set Worker / Contact as a Coordinator.
Add the Coordinator to the Department Hierarchy .
Edit Coordinator Permissions for the Contact record as needed.
Set Contact as a Coordinator
Before a User can be a Coordinator, they must have the Coordinator Type added to the Worker / Contact record.
Manage Contact form example
Navigate to Main > People > Worker / Contact.
Locate the record that should be a Coordinator.
Open the record.
Click the Type multi-select and make sure the Coordinator checkbox is selected.
This requires the Customer Type and adds automatically if it is not already set.
Select the Customer tab and make sure the required field Customer Number is filled.
The Department picker sets the Contact as a member of the Department. Any Services and Equipment owned by the Contact is visible to the Coordinator of that Department. This picker does not set the Contact as the Coordinator.
If the Coordinator should receive the Bill email, make sure the Allow Coordinator Bill Email checkbox is selected. If you do not see the Allow Coordinator Bill Email checkbox, please double check to make sure Coordinator is selected in the Type field.
Save the Worker / Contact record.
Add Coordinators to Department Hierarchy
Once the Worker / Contact is set as a Coordinator, it can be selected as a Coordinator in the Department Hierarchy. Multiple Worker / Contacts can be set as Coordinator for a given Department.
Manage Departmental Hierarchy form example
Navigate to Main > People > Department Hierarchy.
Select the Coordinators tab.
Click the
button.
The Add New Existing Coordinators form opens a list of all the Worker / Contact records with Coordinator type set.
Find the Contact that needs to be a Coordinator for the Department, select them, and click the
Save the Department Hierarchy record.
Repeat this step for every Department Hierarchy that should have a Coordinator.
Setting Coordinator Permissions
The Coordinator is set. When they navigate to the CustomerCenter, they are able to view the Services and Equipment for their Department. This is a multi-step process. There is a default Role called CustomerCenter installed that can either be used as a starting point or as an example of the kinds of Permissions needed for a Coordinator.
Create a Permission for the Coordinators
PCR recommends creating dedicated Permission Sets just for Coordinators.
Navigate to Admin > User Management > Permission Sets.
Click the
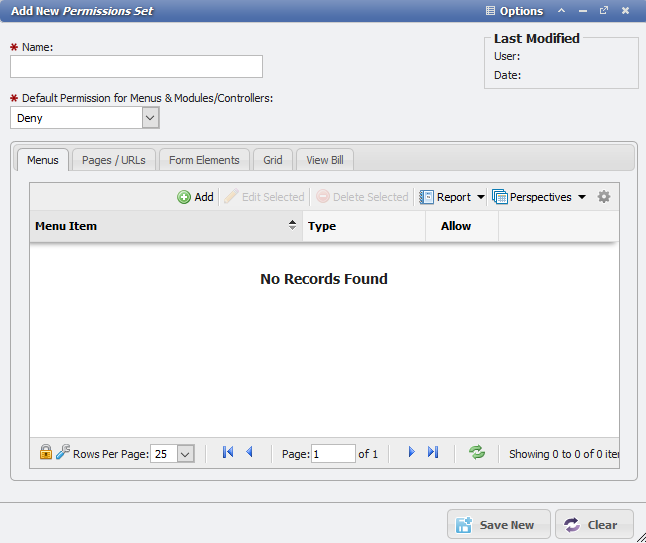
This opens the Add New Permissions Sets form.
Add New Permission Set form example
In the Name field, choose and enter a name for the Permission that makes sense for your organization.
Change the Default Permission for Menus & Pages / URLs drop-down to Read & Write.
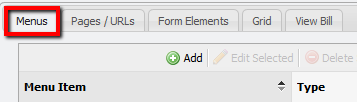
Select the Menus tab.
Click the
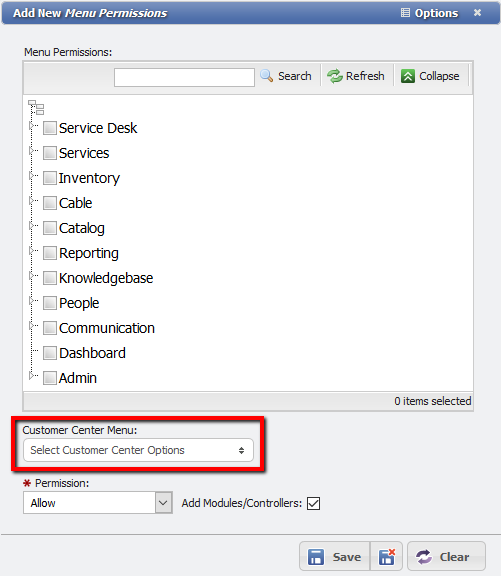
In the CustomerCenter Menu, located near the bottom of the form, click the View Bill check box.
This automatically adds the Billing link in the CustomerCenter for the Coordinator.
Optional: Click the Call Details checkbox to make all calls on Services from a Department available to the Coordinator.
Add New Menu Permission example
Click the
Select the View Bill tab.
Click the
Add New View Bill Permissions example
In the Bill Sections, click the individual sections of the Bill that the Coordinator should have access to.
Optional: In the Call Types, click the individual Call Types for the Bill that the Coordinator should access.
Save and Close the Add New View Bill Permissions form.
Save and close the Permission Set.
The Permissions Set is saved and ready to assign to a Role.
Create a Role for the Coordinators
PCR recommends creating a dedicated Role just for Coordinators.
Navigate to Admin > User Management > Roles.
Click the
This opens the Add New Role form.
Add New Role form example
In the Name field, enter a name for the Role that makes sense for your organization.
Add a Description that makes sense for this Role.
Save the Role by clicking the
Select the Permissions Sets tab.
Click the
Select the Permission that was previously set up for Coordinators and click the
Click the
Assign Role to User/Contact
Finally, the Role must be assigned to the User. The User record should be associated with the Worker / Contact that was made a Coordinator in the first step of this FAQ. There are two ways to assign Users to Roles.
From the Role
This is the fastest method for assigning multiple Coordinators to a Role.
Select the Users tab from the Role setup in the last step.
Click the
Select all the Users that should have the Coordinator Role assigned to them.
The grid can be searched and filtered to quickly find additional Users to select.
Make sure to click the checkbox in the grid to select multiple Users at a time.
Once all the Users desired are selected, click the
The User has the Coordinator Role assigned to them.
From the User
Navigate to Admin > User Management > Users.
Search or filter the grid for the User record that is the Coordinator.
Open the User record.
Add the Coordinator Role in the Roles select list.
Save the User record by clicking the
 button.
The User has the Coordinator Role assigned to them, and this method has to be repeated for every Coordinator.
Using the Prorate flag
The Prorate flag only applies to Recurring Charges. The default behavior of Charges is to bill the full Charge for the entire month. This behavior can be overridden with the Prorate flag. The Prorate flag bills for a given partial date range based on the Start Date of the Charge. Proration splits the Charge into daily increments based on the Bill cycle. The period between the Start Date of the Charge and the next Bill will be used to calculate a percentage that will be applied to the Amount of the Charge to get the calculated amount for the Prorated Charge.
Admins can force ALL Charges to be Prorated with the Configuration Option BILL_MRC_CHANGE_FORCE_PRORATE .
Note: When using this Configuration Option, the Prorate flag on forms and Prorate column on grids will both be hidden. The Prorate flag will still be set, but the values are hidden to prevent confusion.
Prorate Examples
Assume the following basic information for each of the following scenarios:
The last Bill was run for the Month of April, from April 1st through April 30th.
The Charge amount is $90.00.
The next Bill will run for the Month of May, from May 1st through May 31st.
Without the Prorate flag
A User adds a Charge on May 15th, without the Prorate flag set. In June the Bill runs for the full amount of the Charge, $90.00.
A User adds a Charge on May 8th, without the Prorate flag set. In June the Bill runs for the full amount of the Charge, $90.00.
With the Prorate flag
A User adds a Charge with a Start Date of May 16th, with the Prorate flag set. In June the Bill runs for the prorated amount of the Charge, $45.00.
The calculation for this is 15 days divided by 30 days for a total bill period of .5 or 50 percent.
$90.00 multiplied by the .5 percent for $45.00 total. (15/30)*$90.00.
A User adds a Charge with a Start Date of May 8th, with the Prorate flag set. In June the Bill runs for the prorated amount of the Charge, $66.77.
The calculation for this is 23 days divided by 31 days for a total bill period of .74 percent.
$90.00 multiplied by .74 percent for $66.77 total. (23/31)*$90.00.
Note: The actual percent is much longer (23/31 = .7419... ). This was rounded down in this example for clarity's sake only.
In practice, the full decimal of this example is multiplied by the Charge amount ($90.00) and the result is then rounded based on the Configuration Option BILLING_ROUND_METHOD .
Service Catalogs
The Prorate flag on the Service Catalog sets the default behavior of any Default Charges added to the Service Catalog. If the Prorate flag is set on the Service Catalog, whenever a Service is created in the Service Desk Action , the Charge associated the Service will be set to Prorate. This can be verified by opening the Charge on the Action's Charges tab and checking the flag on the Charge.
This is the default behavior only, and any User can always override the default behavior by toggling the flag on any given Charge.
Equipment Catalogs
The Prorate flag on the Equipment Catalog sets the default behavior of any Default Charges added to the Equipment Catalog. If the Prorate flag is set on the Equipment Catalog, whenever an Equipment record is added to a Service Desk item, the Charge associated the Equipment will be set to Prorate. This can be verified by opening the Charge on the Action's Charges tab and checking the flag on the Charge.
This is the default behavior only, and any User can always override the default behavior by toggling the flag on any given Charge.
Charges
Both of the previous examples are the default behavior of the Services and Equipment Catalogs. However, the Prorate flag on individual Charges can be set for any specific Charge. This is done on the 'Add New Charge' form for Services, Equipment, Service Desk items, and GLA Catalogs.
As previously noted, this flag will be set by default to whatever the value for it is in a Service Catalog Or Equipment Catalog. In the generated Charge, the Prorate flag can be set or overridden based on the needs for that specific Charge on this form. For some Charge types, like the Service Desk Charge, or the GLA Catalog Charge, this is the only place the Prorate flag can be set.
Prorate Flag and Effective Date
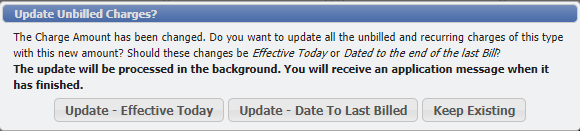
Update Unbilled Charges dialogue
Charges can be one time (Non-Recurring) instances or recurring (Monthly, Quarterly, Semi-Annual, Annual) instances of expenses. For Monthly Recurring Charges, the user has the ability to update these, and specify the Effective Date for the changes. There are two update options for Effective Date: Effective Today or Date to Last Bill, and an option to cancel the update. These options dictate when the changes will become effective.
Effective Today: This means that the MRC will be stopped with the old details (GLA, Amount, Quantity, etc.) yesterday and restarted with the new details today. When the Bill is run for the next billing cycle, if the Prorate flag is set, the charge will bill a portion of the month with the old details and the rest of the month with the new details. Alternate Recurring Charges (Quarterly, Semi-Annual and Annual), can not be set to using the current Date as the Effective Date.
Date to Last Bill: This means that the MRC will be stopped with the old details (GLA, Amount, Quantity, etc.) on the Billed Through Date and restarted with the new details on the next day. When the next Bill is run the entire month should be billed with the new details. Alternate Recurring Charges (Quarterly, Semi-Annual and Annual), when updated will use this as the Effective Date.
Keep Existing: This means that changes to the MRC will be left unchanged, and all new MRCs created after this point will reflect the updated value for the Charge Amount.
There are two ways a comment can be made on a Charge:
Using the Charge's Description
Making a Remark on the Item the Charge is applied to
Comments within Descriptions
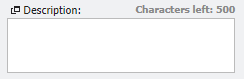
Description field example
Comments can be added to the Description of the Charge. This gives the comment a high degree of visibility, but also means the comment will display on Bills. This means that a User will need to, later on, go back to the Charge and remove the comment so that it does not keep appearing on future Bills. Due to the maintenance of the Description necessary to support the comment using this method, using this method is not recommended.
Remarks as Comments
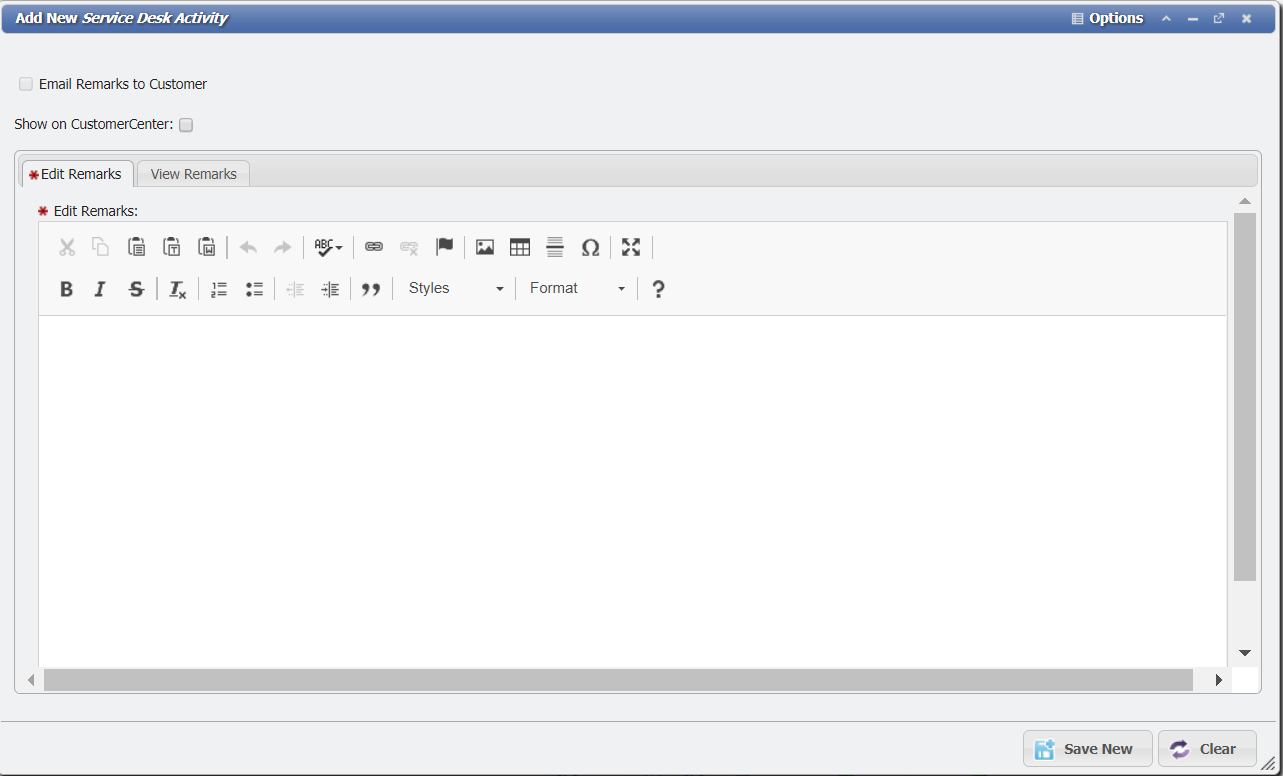
Remark Form example
Using the Remarks tab on the item with the Charge (Service/Equipment/GLA/Service Desk Item), comments can be made about the Charge. These Remarks do not have a high level of visibility, and will not appear on the Bill. The Remark is saved for as long as it is left on the record it is saved to, and requires no further action from a User. This makes it the recommended method for putting a comment on a Charge.
There could be a number of reasons, but the most common is having too many records like Equipment, of a significant number of Actions on a single Order.
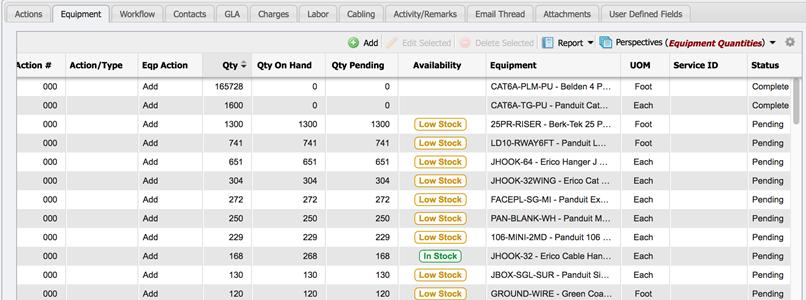
Service Order with a large number of Equipment example
When attempting to complete a Service Order, with a large number of Equipment, the application may encounter a time-out, do to the strain on the system trying to create and modify the large number of Equipment records. PCR-360 has two recommendations for best practices when using this functionality.
Equipment with large quantities should be set up with Units. The use of the Units field will allow the system to process the Equipment records more quickly.
If a time-out does occur, completing each Equipment entry individual will be required before the Service Order can be created.
Note: Due to system processing constraints the API, Service Desk Wizard, Bulk Update Process and Import Process are unable to Complete or Finalize Service Desk Items.
Here are a few different tips and hacks to help Admins set up Permissions.
Overview
If when attempting to view a Cable Path, view the History Report, or perform a 360 Search, and the User receives a Permissions Error instead of the desired results, there is an easy way to fix this.
Note: The User will have to log out and log back in to receive the updated Permissions once they have been corrected.
Granting Permissions for View Cable Path
Open the Permission Set used by that User, click on the Pages/URLs tab and click the
 button.
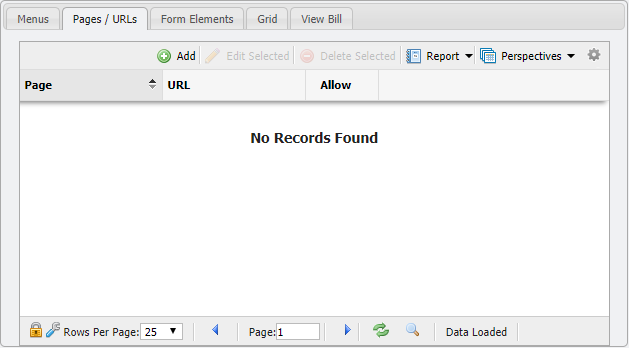
Pages/URL Tab example
The Page should be Cabling and the URL should be View-Path
Leave the Permission dropdown at Allow.
Permission Set Up Example
Click the
 button to save the Permission change.
Granting Permissions for History Report
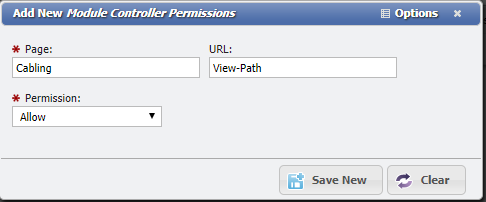
Open the Permission Set used by that User, click on the Pages/URLs tab and click the
button.Pages/URL Tab example
The Page should be Core and the URL should be Audit
Leave the Permission dropdown at Allow.
Permission Set Up Example
Click the
 button to save the Permission change.
Granting Permissions for 360 Search Results
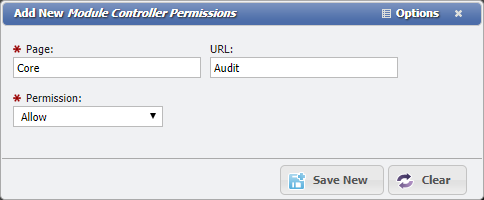
Open the Permission Set used by that User, click on the Pages/URLs tab and click the
button.Pages/URL Tab example
The Page should be Core and the URL should be 360
Leave the Permission dropdown at Allow.
Permission Set Up Example
Click the
button to save the Permission change.
Privileges blocked to the Wiki?
Help Pop Out Menu example
When a Permission Set is set to "Deny" by default for "Menus & Pages / Urls", any User who uses that Permission Set will be denied access to search the Wiki. This can be easily corrected by adding Permissions to the Wiki Specific URLs.
Add the following Permission to the impacted Permission Sets:
Page: Default
URL: wikihelp
Allow: yes
Permission Sets
'Permissions' and 'Roles' are often thought of as a One to One relationship. For example, a Role of 'Admin' and a Permission Set of 'Admin'. This can mean a massive number of both that must be created if there are pieces of the application that the Administrator wishes to restrict from a User group. A more effective way of handling this is to create a Permission Set that manages a specific function and then assigning that Permission Set to the appropriate Role as needed. Said another way, Permissions are most effective when used to disallow single or small sets of items, rather than to explicitly allow all sets of an item.
For the example, the User should examine allowing a section of the application to a Role. This Role is the 'Example Role'. The 'Example Role' has a specific business role that must be controlled so the User cannot access some sections of the application but for other sections, access is desired. This 'Example Role' should have the following rules:
'Example Role' should be able to access the CustomerCenter
'Example Role' should be able to access the Knowledgebase
'Example Role' should be able to access Service Desk: Requests, however, Example Role should NOT be able to 'Delete Selected'.
'Example Role' should NOT be able to modify Requestor.
In this case, the Best Practice of Permission Sets for Example Role could have five Permissions assigned to it. By taking this incremental access approach to Permissions Sets, an Admin can guarantee that even organizations with a large number of Users only access the portions of PCR-360 that are allowed to specific User groups and management of Roles, and Permissions becomes easier in the long term. The following list of examples shows how to create these Permissions Set and end with creating the Role.
Example One - CustomerCenter Only
The first 'Permissions Set' allows access to ONLY CustomerCenter.
Navigate to Admin > User Management > Permissions Sets.
Click the 'Add' button.

Enter a 'Name' of "CustomerCenter Only".

This title lets other Users easily know the intent of the Permissions Set.
Leave the 'Default Permission for Menus & Modules/Controllers:' set to 'Deny'. This ensures access to ONLY what is added.
On the 'Menu' tab, click the 'Add' button.
This opens the 'Add New Menu Permissions' form. Click the 'CustomerCenter Menu' field.
Select 'Check all'. UNKNOWN_ATTACHMENT
Click the 'Save' button.

This creates a Permission Set that only allows access to the CustomerCenter.
Note: Roles that are assigned this Permission Set are not allowed to access any other area of the application unless additional Permissions are granted.
Example Two - Knowledgebase Only
The second 'Permissions Set' allows access to ONLY CustomerCenter.
From Admin > User Management > Permissions Sets again click the 'Add' button.
Enter a 'Name' of "Knowledgebase Only".
Leave the 'Default Permission for Menus & Modules/Controllers:' set to 'Deny'. This ensures access to ONLY what is added.
On the 'Menu' tab, click the 'Add' button.
This opens the 'Add New Menu Permissions' form. Click the 'Knowledgebase' check box.
Click the 'Save' button.
This creates a Permission Set that only allows access to the Knowledgebase.
Note: Roles that are assigned this Permission Set are not allowed to access any other area of the application unless additional Permissions are granted.
Example Three - Service Desk: Requests Only
The third Permissions Set allows access to the Service Desk, but ONLY to the Requests sub menu.
From Admin > User Management > Permissions Sets again, click the 'Add' button.
Enter a 'Name' of "Service Desk: Requests Only".
Leave the 'Default Permission for Menus & Modules/Controllers:' set to 'Deny'. This ensures access to ONLY what is added.
On the 'Menu' tab, click the 'Add' button.
This opens the 'Add New Menu Permissions' form. Click the 'Service Desk' check box.
Deselect the all the check boxes in the Service Desk tree EXCEPT for the 'Requests' check box.
Click the 'Save' button.
This creates a Permission Set that only allows access to the Knowledgebase.
Note: Roles that are assigned this Permission Set are not allowed to access any other area of the application unless additional Permissions are granted.
Example Four - Service Desk: Requests (no delete)
The fourth example removes the 'Delete Selected' button ![]() from the 'Service Desk: Requests' Grid. Both the fourth and fifth examples start in the Permissions Sets Grid and move to 'Service Desk: Requests' to finish creating the specific Permissions.
from the 'Service Desk: Requests' Grid. Both the fourth and fifth examples start in the Permissions Sets Grid and move to 'Service Desk: Requests' to finish creating the specific Permissions.
From Admin > User Management > Permissions Sets again click the 'Add' button.
Enter a 'Name' of "Service Desk: Requests (no delete)",
and then click the 'Save New' button.
'Add' another Permission Set and give it a 'Name' of "Service Desk: Requests (lock requestor)",
and then click the 'Save New' button.
Now that there are two blank Permissions Sets, ("Service Desk: Requests (no delete)" and "Service Desk: Requests (lock requestor)") navigate to Main > Service Desk > Requests
To set up the fourth Permissions Set of 'Service Desk: Requests (no delete)', follow these steps:
From the 'Service Desk: Requests' Grid, locate and click the "Permissions" button
in the lower left-hand corner of the Grid.
This opens the 'Add New Grid Permissions' form.
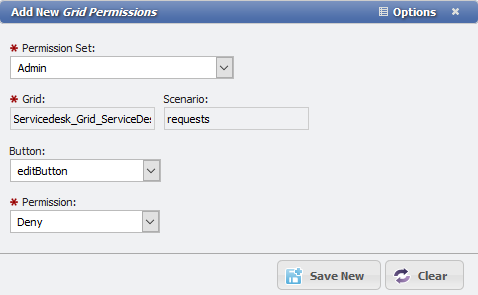
In the 'Permission Set' field, locate and select the "Service Desk: Requests (no delete)" Permission that was set up in Step 2 above.
In the 'Button' field, locate and select "deleteButton".
Make sure the 'Permission' field is set to "Deny".
Click the 'Save New' button.
This saves the fourth Permission Set of Service Desk: Requests (no delete).
Example Five - Service Desk: Requests (lock requestor)
The fifth and final Permission Set is a little more complicated. The desire is to lock the 'Requestor' field on the Requests so that this User Role cannot modify it. This needs to be done for all three Types of Requests ('Incident Request', 'Service Request', and 'Inquiry') to be effective. To do this follow, the following steps:
Start with an Incident Request. Locate a Request in the Grid that starts with "IR" and double-click or select and click the 'Edit Selected' button.

Click the 'Options' menu,

and then click 'Permissions Builders'
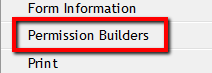
in the menu.
Small 'Lock' buttons appears next to all lockable form elements. Click the one next to 'Requestor'
This opens the 'Add New Form Element Permissions' form.
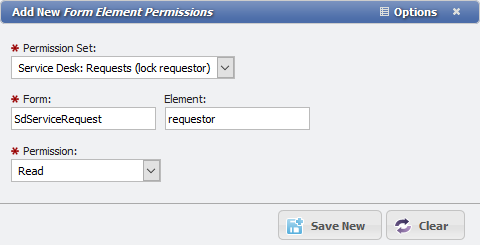
In the 'Permission Set' field
locate and select the "Service Desk: Requests (lock requestor)" Permission that was set up in Step 2 of Example Four .
Make sure the 'Permission' field
is set to "Read". This keeps Users with the Role from editing the field.
Click the 'Save New' button.
That sets up the fifth and final Permission. The only step remaining is to define the Role.
Setting up 'Example Role'
To bring it all together, the User should create the Role 'Example Role'. Navigate to Admin > User Management > Roles
Click the 'Add' button.
This opens the 'Add New Role' form.
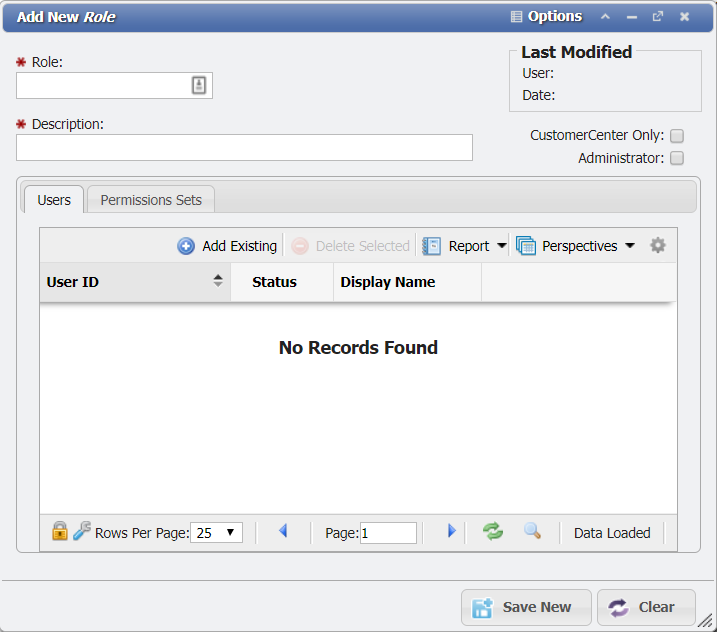
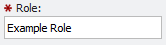
Add a name of "Example Role" in the 'Role:' field.
Add a 'Description' of what the Role does. This 'Description' shows in the Grid, and can help identify the intent of a Role.
On the 'Permissions Sets' tab,
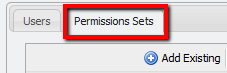
click the 'Add Existing' button.
This opens the 'Add New Existing Permission Sets' form.
Select the five Permissions Sets ('CustomerCenter Only', 'Knowledgebase Only', 'Service Desk: Requests Only', 'Service Desk: Requests (no delete)', and 'Service Desk: Requests(lock requestor)') that were created at the begining of the Best Practices wiki.
Click the 'Save and Close' button.
The Permissions Sets are added to the Grid on the Permissions Sets tab.
Click the 'Save New' button.
The Role appears in the Grid now.

Now Users can be added to the "Example Role" and the Administrator knows that any User with a Role of "Example Role" are limited to only the sections that were set for it. Using this method of incremental Permissions Sets an Administrator can effectively and quickly manage the User Roles. For instance, now that Example Role is set with its Permissions Sets, suppose another Role is needed with only access to the CustomerCenter and Knowledgebase. It becomes a simple matter to create a new Role, "Example Role Two" and assign to it the Permissions Sets of 'CustomerCenter Only' and 'Knowledgebase' only. In this way, the previous Role of "Example Role" is unaffected by the need to create a second Role while the Admin can re-use previously created Permissions Sets.
Catalog Tree Permissions can be set to Readonly or Permissions denied.
From the Manage Permission Set Form, the User can set Permissions for a Form Element by clicking on the Form Elements tab.
The Permission can be set to either Read, Deny, or Read & Write.
Set a form to Read-Only
There are two quick methods to set a form to read-only. On method simply makes the elements read-only. The second method will remove the Form's buttons. Either of these methods can prevent changing individual fields, however, both should be used together to truly lock a field down so it cannot be modified in any way.
Set all elements to Read-Only
Open the form that needs Read-Only Permissions
Navigate to Options > Permissions Builders in the form header.
Click any of the
This will open the Add New Form Element Permissions form.
Select the Permission desired in the Permission Set drop-down.
Select the Element text field and delete whatever is in that field.
Add an asterisk "*" to the Element field.
Element field example
Set the Permission drop-down to Read.
Click the
The Permission is set as read-only for every Element on the form.
Set form to Read-Only to remove buttons
Open the form that needs Read-Only Permissions
Navigate to Options > Permissions Builders in the form header.
Click any of the
This will open the Add New Form Element Permissions form.
Select the Permission desired in the Permission Set drop-down.
Select the Element text field and delete whatever is in that field.
Leave the element text blank in the field.
Element field example
Set the Permission drop-down to Read.
Click the
The buttons will be removed from the bottom of the form.
All a user's assigned Workflow can be found in the "My Service Desk" section of the application.

Service Desk Menu example
The My Service Desk function organizes all Service Desk items that the User is associated with.
To access My Service Desk, click the Service Desk icon in the 'Main' tab and select the node entitled 'My Service Desk' see image above. To see the three collapsible sub-categories that make up a User's Service Desk responsibilities, click on the folder entitled 'My Service Desk'.
Double-click on any of the three sub-categories and Users will be presented with a grid that lists each Service item that requires attention by category.
Service Rep lists all current Service Desk items that are assigned to the User as the Service Rep;
Workgroup lists all current Workflow items that have the lowest sequence Pending with a Start Date is assigned to any of the current User’s Workgroups.
If the current User is a Workgroup Manager
The User will see all lowest sequence pending Workflow items with a Start Date assigned to their Workgroups.
If the current User is NOT a Workgroup Manager
The User will see all lowest sequence pending Unassigned Workflow items with a Start Date assigned to their Workgroups.
The User will see the lowest sequence Workflow items assigned to them.
Assigned Workflow lists all Service Desk Workflow items that have Pending Workflow with a Start Date assigned to the current User as the Worker.
Users can edit items on the Grid of all three sub-categories. To edit an item on a My Service Desk Grid, select the item and click the Edit Select button or simply double-click the item.
In the case of the Workgroup and Assigned Workflow grids Users are able to directly open the exact
Double-clicking on a record in the Grid for Workflow/Workgroup/Assigned Workflow will open the exact Service Desk Workflow/Workgroup/Assigned Workflow Form related to that Grid.
RECIDs can be accessed from several methods. The 'API', 'AdHoc Grids', Database query access, 'History Report', or 'Sharing' links can provide this information. Make sure to consult the Data Dictionary to verify what application record contains the RECID needed.
API
Using the SQL Endpoint, Users can execute SQL queries that lookup a specific record. Using a SELECT statement, Users can add the RECID column to the list of fields to see for your SELECT. The return response from the API will look something like:
{
    "status": "success",
    "page": "1",
    "count": 1,
    "total_count": "1",
    "results": {
            "RECID": "433",
            "TENANTS_RECID": "0",
            "MODIFIED_DATE": "2018-01-16 15:30:48",
            "MODIFIED_BY": "00137148",
            "USERID": "01178496",
            "CONTACTS_RECID": "21945"
        },
	"debug": {
        "APIKEY": "gXafmC5zgTv4VRI4GvXdyd7x2lmWmCQJ",
        "TYPEFORMAT": "sql.json",
        "SQL": "SELECT RECID, TENANTS_RECID, MODIFIED_DATE, MODIFIED_BY, USERID, CONTACTS_RECID FROM USERS WHERE USERID = '01178496'",
        "request_method": "POST",
        "LIMIT": "20",
        "PAGE": "1",
        "TENANTS_RECID": "0",
        "type": ""
    }
}
AdHoc Grids
Using an AdHoc Grid Users can use the Query Builder to construct an SQL Query to find the RECID you need. All Tables have a RECID column to identify each record of that table.
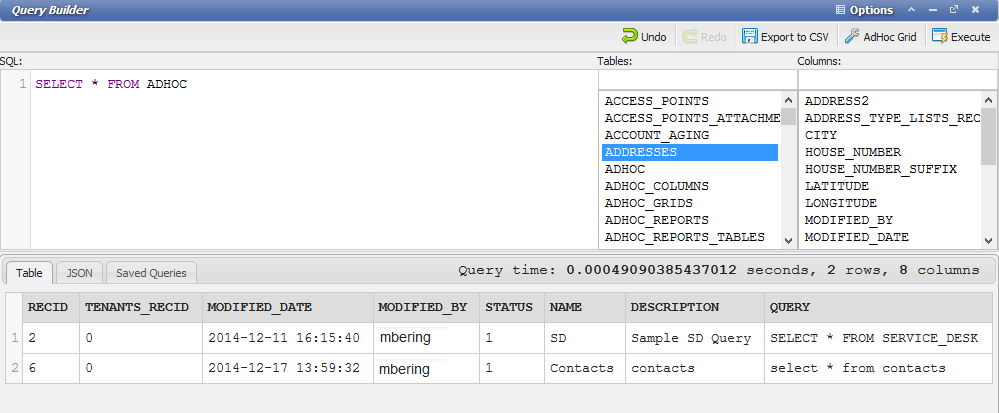
AdHoc Grid Example
Database Query Access
Using the Organization's Database Access Client (such as HediSQL or Oracle SQL Developer) Users can connect to the Database directly, and construct the SQL Query to look up the RECID needed.
History Report
When accessing the 'History Report' Menu Option on a Form, a User can find the RECID at the top of the page. The History Report calls out the RECID as the 'Record ID'.
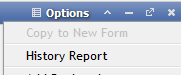
Options Menu Example
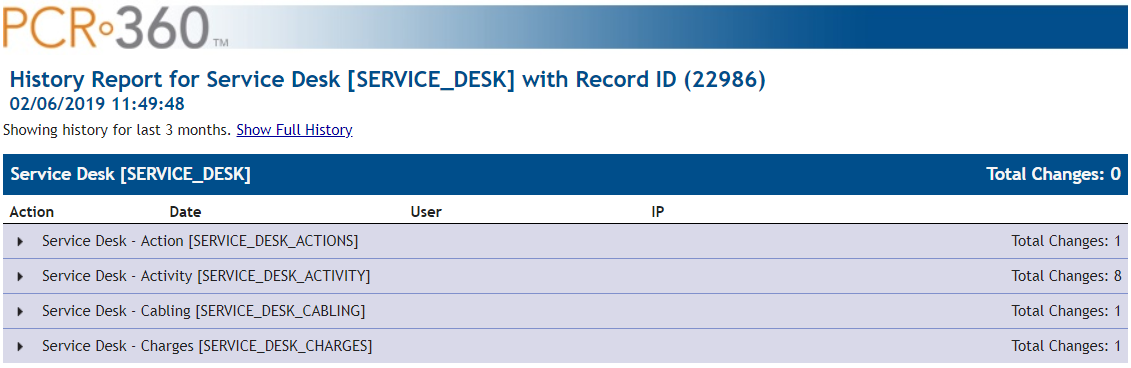
History Report Example
Form Link
PCR-360 allows Users to share specific records to other authorized Users by the use of direct links to the record in question. Open the Options Menu on the Form, and select the "Get Link" Option.

Get Link Form Example
At the end of the link to the form is the RECID for that specific record.
Admin Access
Users with Admin Privileges have access to viewing RECIDs on a normal Grid. To get the RECID, click the ![]() button and check the box for ROWID.
button and check the box for ROWID.
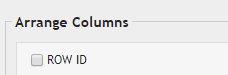
Arrage Columns example image
Here is the full list of what Admin Privileges allow for:
Simple Admin only Items:
Access to Form Permission Builders
Access to Grid Permission Builder
Access to the Ad hoc Query Builder
Ability to create Global Events in the Calendar
Access to all Historical Crystal Reports (deprecated)
Ability to Assign/Edit Historical Crystal Reports (deprecated)
Ability to Add Crystal Reports to a Form (deprecated)
Access to all Saved Custom Reports
Ability to Assign/Edit Saved Custom Reports
Ability to Add Custom Reports to a Form
Ability to Add Custom Reports to a Grid
Ability to Edit the Menu
Ability to Approve Knowledge Base Articles
Ability to Delete Service Desk Actions
Access to the Manage Reports link on the form Options menu
Access to the Manage Validation link on the form Options menu
Ability to display RECIDs on grids
Additional Items that depend on a Configuration Option:
Ability to Manually edit charges - MODIFY_CHARGES_WITHOUT_SERVICE_DESK
Ability to Modify Serial Numbers on Equipment - MODIFY_SERIAL_NUMBER
Ability to Edit Remarks - REMARKS_EDITABLE
Ability to Override Billing Groups on Services - MODIFY_CHARGES_WITHOUT_SERVICE_DESK
Ability to Complete/Delete workflow with configuration specifies - SD_WORKFLOW_PERMISSIONS
RECID vs. ROW ID
The usage of RECID or ROW ID is for clarity about what the RECID or ROW ID represents.
ROW IDs - Row Identification Numbers (ROW IDs) are unique IDs to the row of data in the grid they're assigned to. Some grids do not have a RECID but all grids have ROW IDs.
RECIDs - Record Identification Numbers (RECIDs) are unique IDs for records within a given table. When a grid references a specific record from a table, the Table Name is usually the column name of the RECID that the grid is referencing.
IE: SERVICES_RECID in any given grid is referencing the RECID value from the SERVICES Table.
Some table names are long and need to be abbreviated to meet the 30 character limit imposed by Oracle Databases.
There are several reasons both are used.
Some grids have multiple RECIDs and a ROW ID is unique to that row of data in the grid.
Some grids don’t have a RECID and the ROW ID is unique to that row of data.
Some ROW IDs are actually combined RECIDs for two or more records in the row.
When PCR-360 is upgraded sometimes a column name is changed to accommodate new functionality. Perspectives reference the database columns and any change to the underlying columns will break a Perspective. The old ones will need to be deleted and recreated. PCR works to keep these disruptive changes to a minimum but sometimes they are inevitable. Please review the Release Notes to see what columns are added or changed between versions.
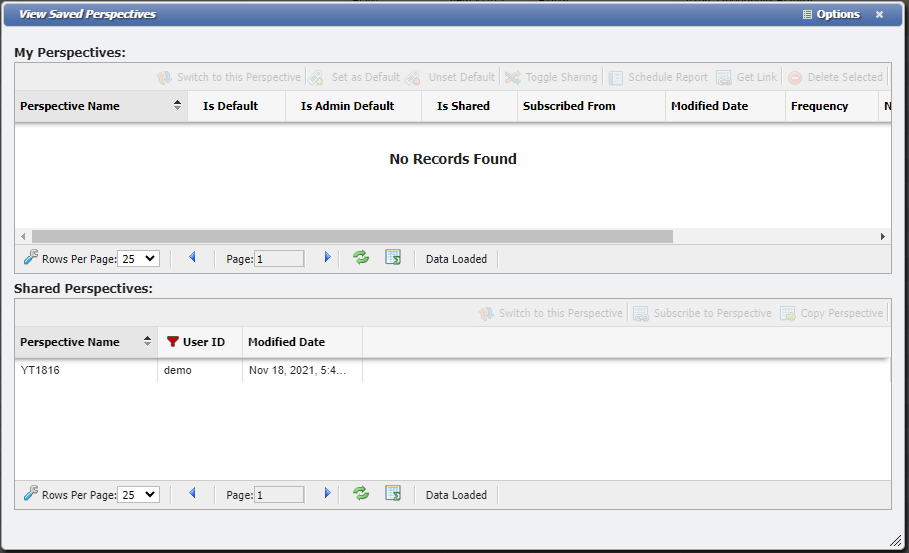
Example of the View Saved Perspectives Form
Currently if any changes are made to the Perspective the scheduled report is tied to, the scheduled report is removed as the newly changed perspective is considered new. Whenever a Perspective is changed, any desired scheduled reports would need to be re-added.
There is no History Report for Perspectives or their scheduled reports. However, for SysAdmin Users, the 'Admin: Audit' grid does contain the changes made to the table 'USERS_PERSPECTIVE' which will provide most of the information needed to rebuild a lost Perspective. This grid does contain a large amount of records so it is recommended to begin looking by adding a filter to the 'Table Name' (USERS_PERSPECTIVE) and 'Date' columns.
Common examples of changes that might be made to Perspectives is the addition of a new column on a grid, or the removal of an existing column on a grid.