360 View: Wizard
The Wizards allow Users to build Service Orders quickly from a number of different areas of PCR-360. These Wizards are meant to speed up the process of creating their given tasks for the User in an easy to use interface.
Multi-Action Wizard
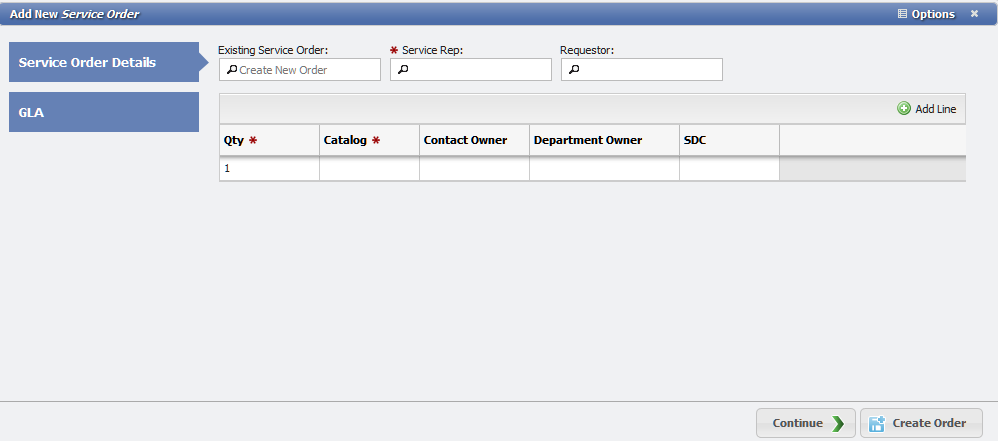
Add New Service Order form
The 360 Wizards allow a User to create one or many different Actions on a Service Order at once or report Incidents. Users have three Wizards to help them: Add Wizard, Change Wizard, and Incident Wizard. All Action types can be created with the Wizard. This wiki article explains how to use the Wizards to rapidly create Actions. The Incident Wizard is discussed on a different wiki page.
Navigating to the Multi-Action Wizard
360 Form Access
Perform a 360 Search for the desired topic
2. Open the 360 form for the desired record.
3. Click on the Services tab.
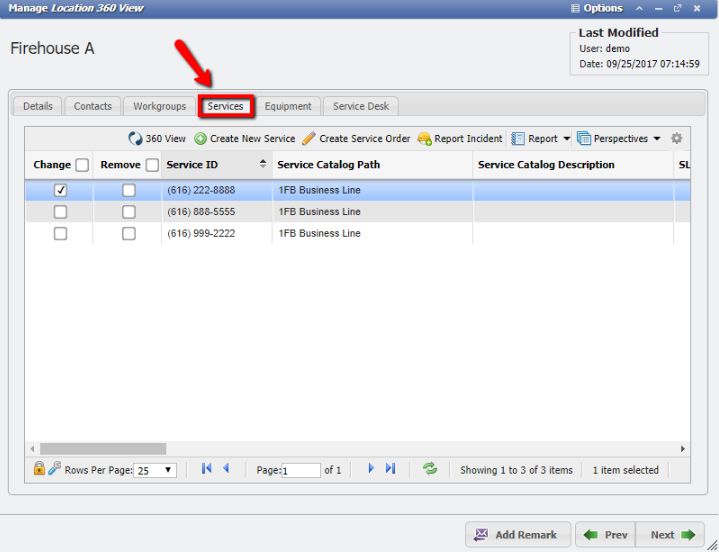
4. The Change Order or Remove Order options can be selected to enable links on the Tab's Grid.
5. Use the Grid to trigger the desired Wizard Form.
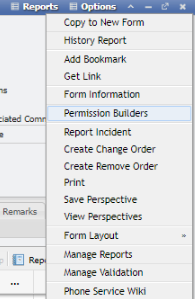
Service Form Access
Open the desired Service Form Record.
Click Options > Create Change Order or Create Remove Order to trigger the Wizard Form.
Using the Multi-Action 360 Wizard
The 'Multi-Action' 360 Wizard allows the User to rapidly create multiple Actions on an Order. Users can choose to append these Actions to an existing Service Order or create a new Order on which to place the Actions. Any Actions can be created with the Multi-Actions Wizard.
Click the Create New Service button to begin the Add Wizard.
Click a Service. Then, click the Create Service Order to begin the Change Wizard.
Check the Change or Remove boxes on multiple Services to make begin the Change Wizard for more than one Service.
Service Order Details
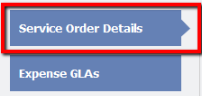
Service Order Details crafts the first part of the Multi-Action wizard. The following fields are common to each of the various Wizard forms, whether Add, Change, or Remove.
Existing Service Order
The Existing Service Order picker provides two types of functionality.
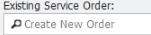
Leaving the Existing Service Order picker blank makes the Multi-Action wizard create a new Service Order for any Actions that are created. The User can see that a new Order will be created as a result of the 'Create New Order' placeholder text.
If an Order is selected and placed into the picker, any Actions created are appended to the existing Order that is selected.
Existing Service Orders can be found on each of the three Wizard types; Add, Change, or Remove.
Service Rep
The Service Rep picker sets the Service Rep on the Order.
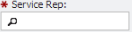
If there is an existing Service Rep on the Order, it will be overridden by the picker. Otherwise, on creating a new Order, the picker sets the Service Rep of the Actions to whatever is set in the picker.
Service Rep can be found on each of the three Wizards, Add, Change, or Remove. Service Rep is a Required field on all three wizards.
Requestor
The Requestor field allows the User to select a Contact from the Workers / Contacts grid.
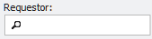
The Requestor field adds to the Order level when creating the Multi-Action.
The Requestor field is only found on the Add wizard.
Action
Choose the appropriate 'Action' from the drop-down.

When removing services, the Action field is automatically set to Remove when creating Remove Actions. This cannot be changed and serves an informational purpose on this form so that the User can see that they are creating remove options.
The Action drop-down can be found on the Change and Remove wizards.
Requested Date
The 'Requested Date' date/time selector allows the User to assign a Requested Date that the Service should be disconnected.
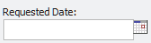
When the Service has a Requested Date set on it, a new Remark will be placed on the Action's Activity/Remarks tab. The Remark reads Requested to be disconnected by with the requested date.
The Requested Date selector can be found on the Change and Remove wizards.
Add Actions
The Add Multi-Action form adds several Actions all at once. Click the ![]() button to create additional lines.
button to create additional lines.
Qty
The Qty selector in the Multi-Action Table allows the User to set the number of Actions that should be created by the Wizard.

For example, if the Qty is set to 5, then 5 new actions are either created or appended to the Service Order when the Wizard is saved with the ![]() button.
button.
Catalog
The Catalog picker allows the User to pick a Service Catalog that needs to be added.

Contact Owner
The Contact Owner picker will select the Contact that should be assigned to the Action(s) as an Owner.
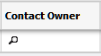
The picker opens and selects any valid Contact to be added to the Action(s).
Department Owner
The Department Owner picker selects the Department that should be assigned to the Action(s) as an Owner.
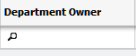
The picker opens any valid Dept. Hierarchy to be added to the Action(s).
SDC
The SDC picker selects a given SDC that should be associated with the Action when it is created.

The SDC picker opens to any valid SDC that is associated with Actions or Orders.
Change Actions
In order to create multiple Change Actions, select the Services from the tab and make sure the Change checkbox is selected for each Service to be changed. All Change Actions will have the Existing Service Order, Action drop-down, Service Rep, and Requested Date fields like on Add Actions.
Note: The Multi-Action wizard will not create Actions for Services with a Suspend or Inactive status. This is because Inactive Services must go through the Aging process. Suspended Services must be made Active (and therefore current in Billing) before they are allowed to have Changes made to them.
Add Locations
The 'Add Locations' change type will allow a User to quickly assign multiple Services to have a new Location. If the Services are not currently set to 'Multi-Location' Services, they will have their flag set and the additional Location will be added to the Service. If there are any non-Phone Services selected when the User attempts to create an Add Location Change Action, the User will see the following notification:

Additional Location on Phone Services Only
Location is a Required field on the Add Location wizard.
Miscellaneous
The 'Miscellaneous' Action type creates a Miscellaneous Action for each of the selected Services.
Move
The 'Move' action lets the User Move all the selected Services to a new Location. For each of the selected Services, the User has the option to set a new Location on the resulting Action. Each Service will automatically be added as a row to the form and have a column with a Location field next to the Service. Simply set the Location next to each selected Service by clicking the Grid row and bringing up the Location picker.
Location is a Required field on the Move wizard.
Owner
The 'Owner' change type allows the User to reassign multiple Services to a new Owner. To change the Owner for the selected Actions, pick either a Contact or Department as an Owner. When the Action is created, the Actions all have the assigned Owner set on them.
New Owner is a Required field on the Owner wizard.
Service ID
The 'Service ID' change type allows the User to set Available Service IDs on multiple Services at once. The selected 'Available Service' will be set to a Status of Order Pending.
New Service ID is a Required field on the Service ID wizard.
Swap
The 'Swap' action type allows the User to set multiple Services to swap their Location with other Services. Each selected Service has a row created. In the row, a User selects the Service to 'Swap'. Each Service selected has its own row set on the wizard. The existing Location is loaded and read-only for informational purposes. Once the User selects a Swap Service, then the Swap Location is loaded into the row also for informational purposes.
Swap Service is a Required field on the Swap wizard.
Upgrade/Downgrade
The 'Upgrade / Downgrade' type loads each of the Services into a row. The Service Catalog form lets the User select a new Service Catalog for each of the selected Services.
Service Catalog is a Required field on the Upgrade/Downgrade wizard.
Remove Actions
To create a number of remove Actions at once, select the Actions that need to be disconnected by selecting the Remove checkboxes for each Service. Then click the![]() button to open the Multi-Action Wizard. Once the Wizard opens the User can select the Service Rep for the Remove Actions. Since Remove Actions are the act of disconnecting a Service, no additional information needs to be added.
button to open the Multi-Action Wizard. Once the Wizard opens the User can select the Service Rep for the Remove Actions. Since Remove Actions are the act of disconnecting a Service, no additional information needs to be added.
Note: The Multi-Action wizard will not create Actions for Services with a Suspend or Inactive status. This is because Inactive Services must go through the Aging process. Suspended Services must be made Active (and therefore current in Billing) before they are allowed to have Changes made to them.
GLA Assignment
Once the Service Order Details have been created, the User will have to assign the GLA(s) that should be assigned to the Action(s). The GLA tab should be navigated to by either clicking the GLA tab or the ![]() button. If no GLA is provided the Default GLAs from the Service will be loaded onto the Action.
button. If no GLA is provided the Default GLAs from the Service will be loaded onto the Action.
This assigns a GLA to any given Action that is created in the Multi-Action wizard. Each Action that is created has the GLA structure that is created in the wizard.
Expense Type - The Expense type to be selected for the GLA.
GLA - The general ledger account to be added to the Action(s).
Percent - The percentage of Billing of the GLA to be billed.
How to template 360 Wizard Actions like a Package
PCR has received a couple of questions recently about selecting Packages on an Order to quickly add multiple Actions. There is already functionality that does this built into the application and this “How to” explains this process.
To set up Form Perspectives to accomplish similar work to the Packages functionality Users will need to first set up an example 'Add 360 Wizard', then save a Form Perspective, and finally apply the Perspective whenever that set of Actions are desired. The following steps will help to clarify how to accomplish using Form Perspectives on the Add 360 Wizard.
In order for Users to set up Form Perspectives to use as Packages, there first must be SDCs set up for the Services and Actions that are desired. To do this please see the SDC video wiki .