Quick Ticks
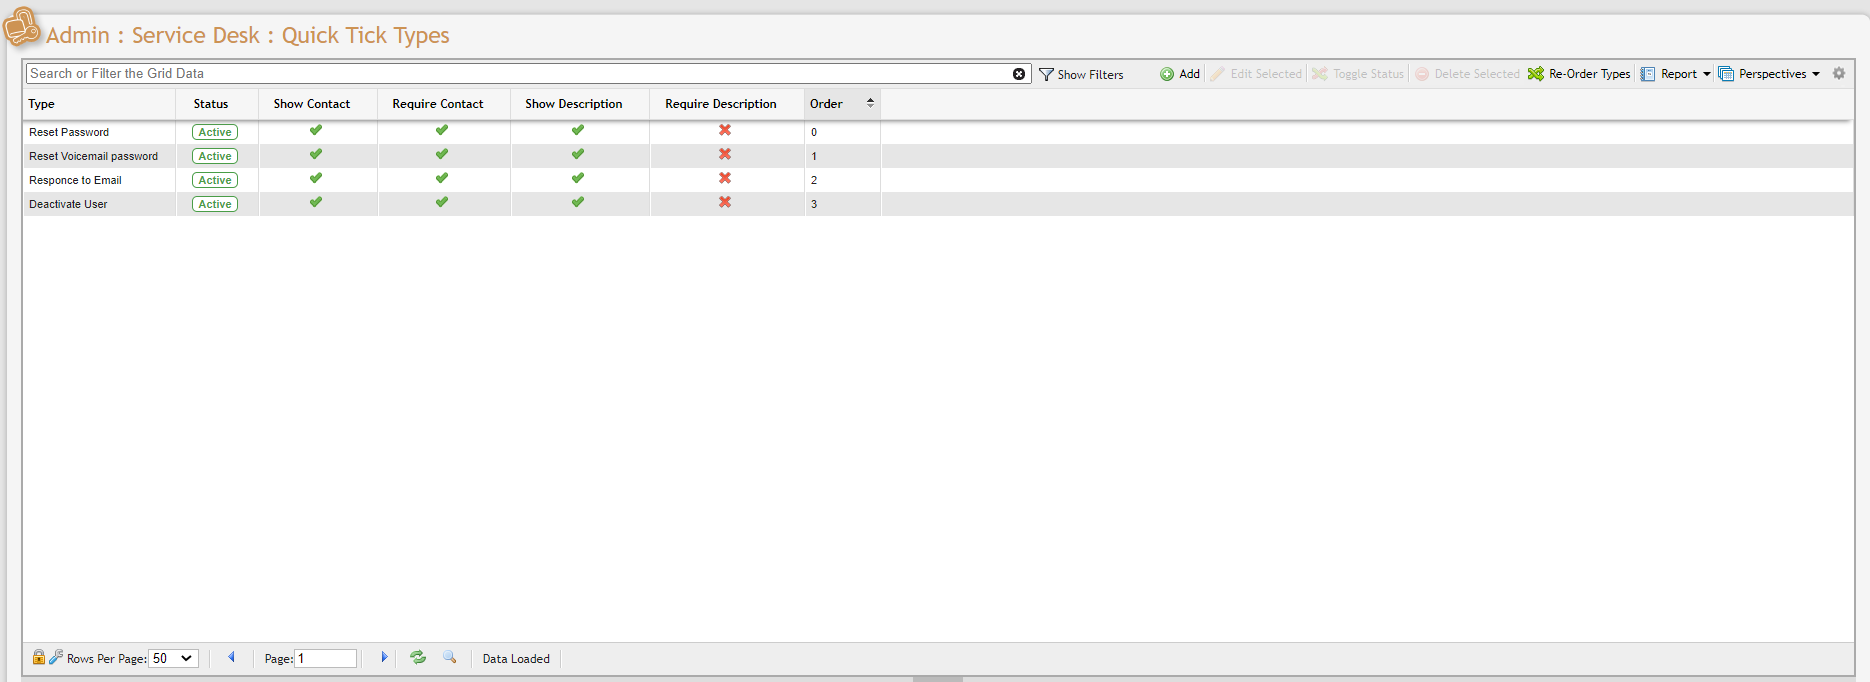
Quick Tick Grid Example
Overview
In PCR-360 Service Desk 'Quick Tick(s)' allow a User to quickly document customer calls, emails and basic inquiries that do not require the creation of a full-Service Desk 'Incident', 'Order', 'Project', or 'Problem'. A User might wish to set up for a 'Quick Tick Type' to include initiating a Password Reset upon receiving a request from another User, or triggering an internal process such as a 'Custom Event', 'Notification' or 'Escalation'. The 
Quick Ticks are an excellent way to track quick work. Password reset requests, tracking call transfers to another department, and providing general information to the customer are just a few situations where a Quick Tick could be used instead of a Service Desk: Order or Incident. It might not be worth going through the entire Order writing procedure just to reset someone’s voicemail, password, email, etc. However, keeping track of how many password-resets your organization does can be very helpful in allocating resources, documenting your workload and considering future procedures and/or charges for work. Quick Ticks provide a quick and easy method to track this type of work.
Quick Ticks are convenient because they can be created from any page in the application.
You may also navigate to Main > Service Desk > Quick Tick and click the 
From the Main > Service Desk > Quick Tick grid, a User is able to view the Assigned Workers, Completed Workers, Assigned Workgroups, and Completed Workgroups related to each item.
Clicking 
A User is unable to add a 'SDC' to a Quick Tick because as soon as it is created, the Quick Tick is finalized.
Create a Quick Tick Type
This process is used to create a Quick Tick Type that can be used to create Quick Ticks.
Go to Admin > Service Desk > Quick Tick Types
Click the
button.Enter a Unique name for the Quick Tick Type
Each Quick Tick Type can minimally have a Contact and Description; just toggle the appropriate checkbox to have it appear for use.
If it is to be Required by the end User, mark the toggle of the Required checkbox.
Click the
button.
Optionally: define as many User Defined Fields as desired to maintain additional information.

Add New Quick Tick Types form example
Create a Quick Tick
There are two ways to create a Quick Tick.

Add New Quick Tick form example
Click the
icon next to the 360 search.Choose the 'Type'

Type field example
Enter information into any required fields.
Click the
 button.
Navigate to Main > Service Desk > Quick Tick.
Click the
button.Enter information into any required fields.
Click the
button.
Updating a Quick Tick
Quick Ticks do not require "Completion" or "Finalization" like a typical Order or Incident. Once a Quick Tick is saved it is considered "Finalized" and generally does not need any additional information after it is saved. Quick Ticks are accessible from the Quick Ticks grid, by going to the Main PCR-360 menu, clicking "Service Desk" and clicking "Quick Ticks". Double-clicking on a Quick Tick in the grid, or selecting a record and clicking the "Edit" button above the grid will bring up the Service Desk Quick Tick form, as seen below.
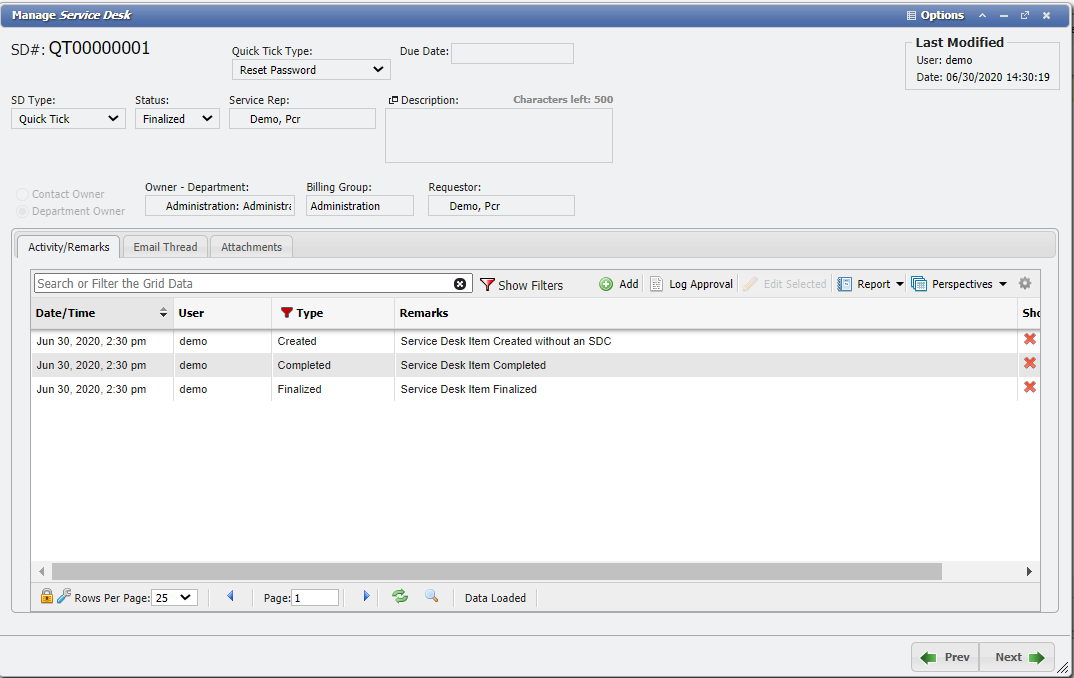
Manage Quick Tick Form
Even though the Quick Tick is finalized, Users may still add Remarks to the Quick Tick, Upload Files to the "Attachments" tab, and track email on the "Email Thread" tab. The "User Defined Fields" tab contains the information entered into the User Defined Fields on the Quick Tick form when the Quick Tick was created.