Service Desk Classification (SDC)
Admin Users can access this sub-section to implement the default SLA Time Specification, default Workflows, default Charges, and default Equipment that can accompany items in the Service Desk. Further, Users can apply the same function to pieces of Equipment when ordered in Service Desk. In other words, certain types of Equipment carry default Charges, Workflows, or SLAs when defaults are in place.
Admin Users can implement existing SDCs and create new SDCs. Accordingly, the SDC grid serves as a comprehensive list of all the SD defaults that one could apply to an SD type.
Adding a New SDC
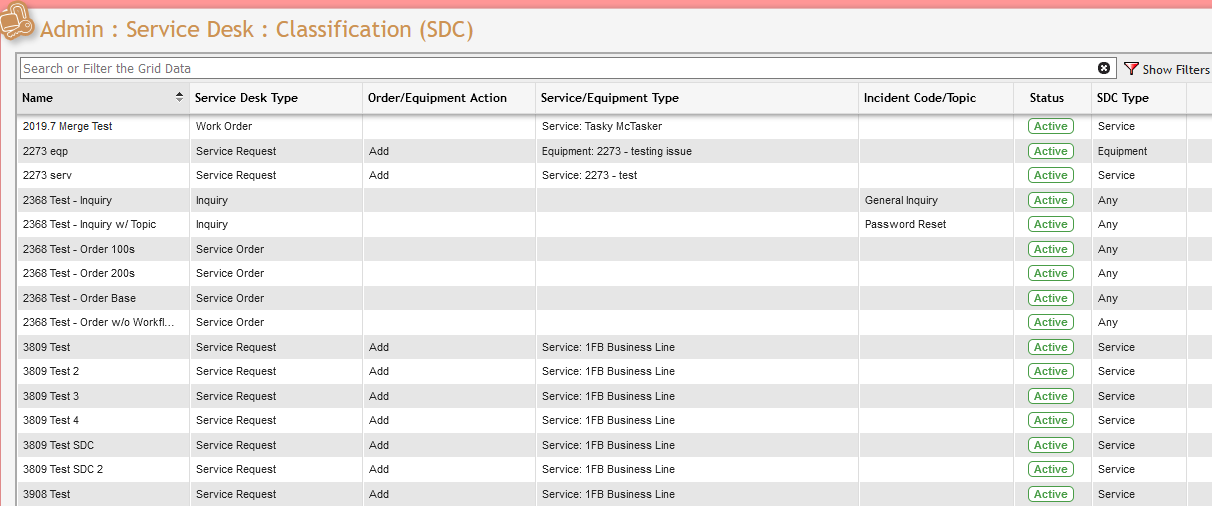
Service Desk Classification grid example
Navigate to the SDC Grid. Admin > Service Desk > Classification (SDC)
This opens the SDC Grid. To add a new SDC, click the
 button located immediately above the Grid.
In the SDC data entry form, Users are prompted to define the SD Type for which this Classification applies. Once they have selected an SD Type, they will be prompted to apply Service Desk defaults. Some SD types allow selecting an SDC Type: Any, Service, or Equipment. Selecting any, other than Any and Estimate, allows a drop-down menu for SDC Type to appear on the form on the right. Users can select the type as needed.
Add New SDC form example
The combination of these two fields, the SD Type and SDC Type, determines which other fields are available on the form. The ‘SD Type’ selection defines which SD items the classification applies to. Accordingly, the User's SD Type selection enables other fields in the classification associated with the defined type. The following chart details the fields that are available on SDC:
See also our Video tutorial: Getting Started with SDCs
Field | Description | Required? | SD Type | Service/Equipment |
|---|---|---|---|---|
Service Type | Service Catalog specification | Yes | All Types, Service Order, Service Request, Incident, Incident Request, Work Order | Service |
Equipment Catalog specification | Yes | Service Order, Service Request, Incident, Incident Request | Equipment | |
What is being done to the Service on the Service Desk item | No | Service Order, Service Request | Service | |
Equipment Action | What is being done to the Equipment on the Service Desk item | No | Service Order, Service Request, Incident, Incident Request | Equipment |
Description of the Incident | No | Incident, Incident Request | Equipment | |
Topic of Problem/Inquiry | Inquiry topic that was selected or extracted from the email subject | Yes | Inquiry | N/A |
Admin Users can now access the SDC data entry forms tabs in order to apply defaults to the recently defined 'Service Type' or type of Equipment. The User can apply SLA, Workflow, and Charge defaults that accompany the defined 'Service Type' or type of Equipment in each tab
To do so, Users can follow the same protocol established in the Editing a SDC section of the Service Desk portion of this manual.
SDC Type
The 'SDC Type' field will set to one of three values, 'Any', 'Service', or 'Equipment'.
Any: Setting the field to 'Any' will allow the SDC to be used for any type of Service or for the "Add from SDC" Workflow button. 'Any' type SDCs are automatically added to when the specified Estimate, Incident, Incident Request, or Inquiry Service Desk Item is created. This does not display the Choose a Service Desk Classification' dialog.
Note: Service Orders and Service Requests are exempted from this automatic behavior.
Note: 'Any' type SDCs do not apply to Service Desk Equipment.
Service: Setting the field to 'Service' will make it so the SDC will be used for either all Services or for a specific Service Catalog when selected. In either case, the SDC will trigger the 'Choose a Service Desk Classification' dialog when creating an Action.
Note: A Service Catalog SDC may have specific related Equipment Catalogs. When this is the case, that Equipment will be automatically added to the Service Request.
Equipment: Setting the field to 'Equipment' requires the Equipment Catalog to be selected. This will automatically add the SDC to the Service Desk item for any Equipment of the specified Equipment Catalog. 'Equipment' SDCs do not require or provide a 'Choose a Service Desk Classification' dialog, because they trigger automatically. Generic 'Any' SDC types will not be triggered by Equipment.
Note: These Standalone Equipment Catalog SDCs are distinct from Equipment added to a Service Request because it's a relationship with a Service. The Equipment SDC can have no association with a Specific Service Catalog.
While on the SDC Grid, Users can utilize the SDC Type column to quickly Filter the Grid based on the SDC Type. The SDC Type field only has the following three values 'Any', 'Service', or 'Equipment'. If you enter a value that is not one of those three, the filter will return with the "No Records Found" message.
SLA Time Specifications
SLA Time Specifications tab example
This is the Time Specification for the SDC. These are preset by the SLAs and can be associated with a specific SDC here.
Use of the Fields
SLA (required) - Select from the SLA Catalog grid.
Hours (required) - This is the time specification for the SLA and represents the allowable hours for the SLA. The allowable hours are affected by several variables also on this form.
Percent (required) - This is the expectation of completed SLAs that should be completed within the specified time frame (e.g. 95% means only 5% of SLAs are allowed run over the Time Specification).
Default - Set the SLA as the Default for the given SDC.
Urgency - Sets the Urgency of the SDC. Any SDC with a higher Urgency overrides a lower Urgency and set the lower Urgency to the same Urgency.
Cushion - Sets a cushion between either the current time and the first schedule attempt (in forward scheduling) or between the due date and the first schedule attempt (in backward scheduling). Overrides the system default which is set with the Configuration Option: SD_WORKFLOW_DEFAULT_CUSHION
Actual Hours - The default for hours is 8 hours per business day. So a setting of 40 hours would mean within 5 business days. Setting 'Actual Hours' to yes by checking it requires no more than 40 contiguous hours for an SLA to be completed.
Setting 'Actual Hours' unsets 'End of Day'.
End of Day - This allows the SLA to be completed by the 'End of Day' (which is set with the Configuration Option WORKDAY_HOUR_STOP) during which the "Hours" run out. For example, if 40 hours is chosen with 'Actual' hours set, and a task is scheduled at 4:00 PM Monday, the task would have to be completed by 8:00 AM Wednesday to be "On Time". End of day extends the deadline to End of Business hours on Wednesday.
Setting 'End Of Day' unsets 'Actual Hours'.
Note: An SLA can not be defined using a relative time frame e.g. "at the end of the month" or "at the start of the month".
A Widget or an AdHoc Grid should be used if you need to see a current list of "Open" Service Desk Items. If you need assistance adding a Widget or creating an AdHoc Grid, please submit a Professional Services request.
To add a Time Specification, follow these steps:
From the 'Time Specifications' tab click the
 button.
 This opens the 'Add New Time Specifications' form.
Add New SDC SLAs form example
Click the SLA picker. Select the desired SLA from the Tree / Grid.
Enter the desired hours into the 'Hours' field.
Enter the percent in the 'Percent' field.
Enter any other desired fields and click the
button.
The 'Time Specification' is added to the Grid.
See also our Video tutorial: Adding SLA Time Specifications to an SDCs.
Default Workflow
See also our Video tutorial: Adding Workflow to an SDCs
New Workflow:
To automatically assign a new Workflow when the SDC is applied, follow these steps:
From the Workflow tab, click the
button.This opens the 'Add New SDC Workflow' form.
Add New SDC Workflow form example
Enter a Wf Number. PCR recommends using increments of 10 or 100.
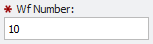
Workflow Number field example
Use the 'Workgroup' picker to select the desired Workgroup.
Click the
This saves the Workflow to the 'SDC: Workflow' Grid. Now whenever the SDC of 'Avaya Phone' is selected in Service Desk: Order, this Workflow automatically adds to the Service Order Workflow tab.
Existing Workflow:
To automatically assign an existing Workflow when the SDC is applied, follow these steps:
From the Workflow tab, click the
button.
This opens the 'Add New Existing Workflow' form.
Add New Existing Workflow Form example
Select any desired Workflows to add
Click the
Default Charges
SDC Default Charges tab example
These are the Default Charges that are to be applied when the SDC is applied. These Charges draw from the Charges Catalog.
Click the
button.The 'Add New Default Charges' tab opens.
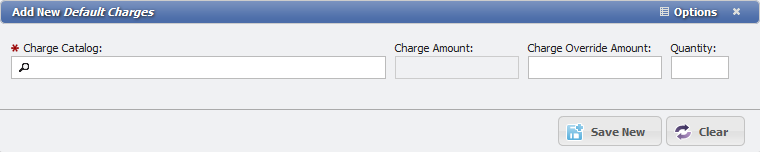
Add New Default Charges tab example
Select a Charge from the 'Charge Catalog' picker.
Enter the 'Charge Override Amount' if desired.
Enter the 'Quantity' if desired.
Click the
The form closes and the Default Charge is applied to the current SDC item. Repeat as necessary to add additional Default Charges.
See also our Video tutorial: Adding Charges and Equipment to an SDCs.
Default Equipment
SDC Default Equipment tab example
These are the 'Default Equipment' that are to be applied when the SDC is applied. These Equipment are drawn from the Equipment Catalog.
To add Equipment, follow these steps:
Click the
button.This opens the 'Add New Equipment' form.
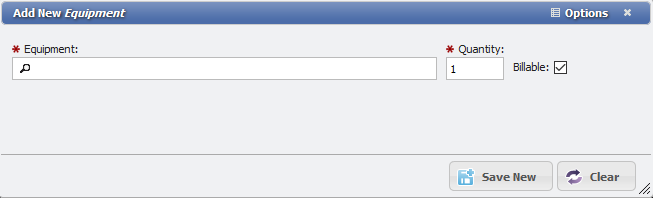
Add New Equipment form example
Select the Equipment(s) that is desired to associate with the given SDC.
Click the
 button.
The Equipment loads by default when the SDC is applied.
See also our Video tutorial: Adding Charges and Equipment to an SDCs
Saving the New SDC
Once all required fields have been satisfied, click the
When an SD item meets the defined criteria enters the Service Desk, the PCR-360 application automatically applies the appropriate defaults to the item.
Editing Existing SDCs
Admin Users can edit existing SDCs by double-clicking on any item on the SDC grid or by selecting an item and clicking the 
This opens the item's SDC data entry form. The User can define the item's inputs by following the protocol established earlier in this section. Once all required fields have been satisfied, click the
Admin Users can delete existing SDCs by selecting the appropriate item on the SDC grid and clicking the 
SDCs for Packages
When creating an SDC for a Package, it is important to remember that each component of the Package will require a separate SDC.