Incidents
When a customer or member of a User's organization has a specific complaint about a Service or piece of Equipment the organization has provided, that complaint is designated as an Incident. Some examples of Incidents include broken phones, bad web connections, or even undesirable office temperatures.
From the Main > Service Desk > Incidents grid, a User is able to view the Assigned Workers, Completed Workers, Assigned Workgroups, and Completed Workgroups related to each item.
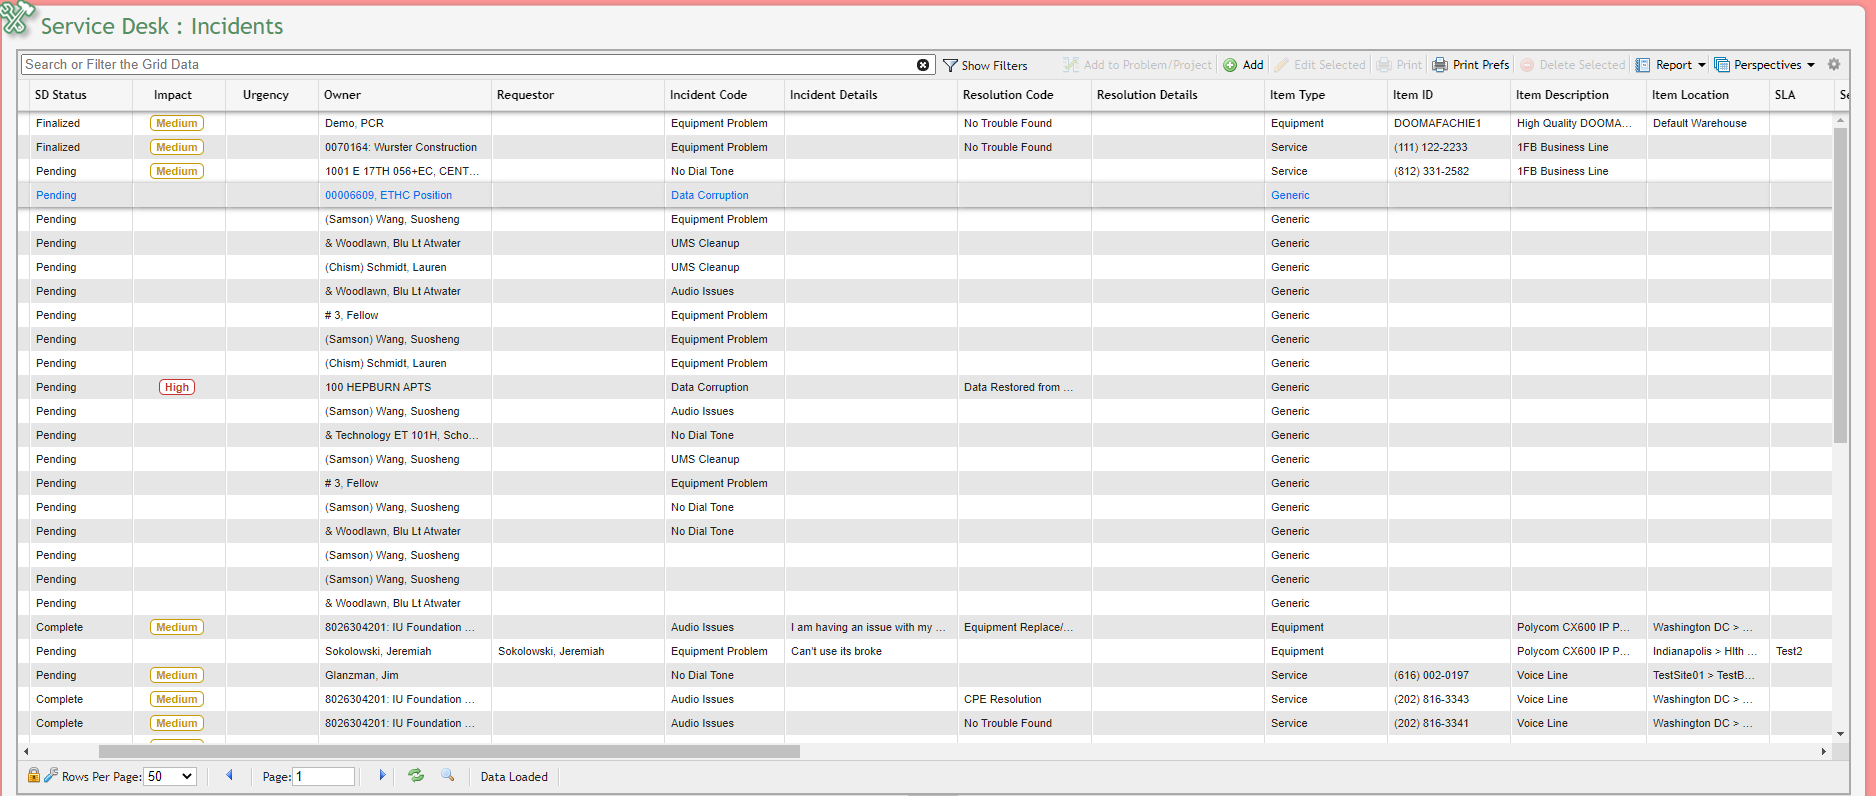
Service Desk Incident Grid
Adding an Incident
Navigate to Main > Service Desk > Incidents. Click the
The User must address the required data fields upon opening the Incidents data entry form (see image below). Each new Incident must have a defined SD Type, Source, Status, Service Rep, and Owner/Contact.
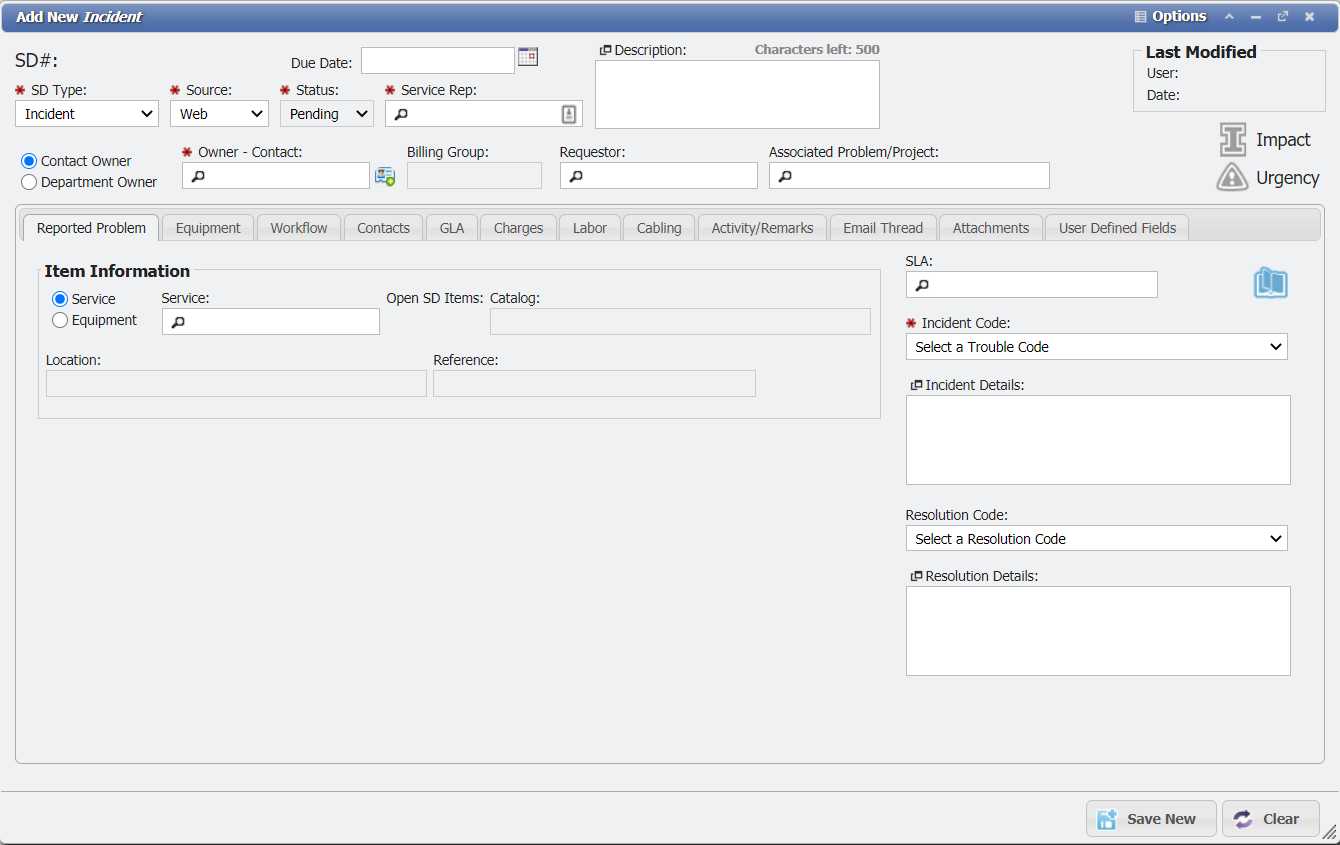
Add new incident form example
The critical difference between the Incident data entry form and its Service Request and Order counterparts lies in the first tab, entitled 'Reported Problem'. On the tab there is now a Service and Equipment radial selector. The first thing the User would need to do is select Equipment if the Incident is on Equipment since Service is selected by default. After selecting either Service or Equipment the User can then click the Picker.
Once the User has selected the Service or Equipment associated with the Incident these fields will be set to read-only. The 'User Defined Fields' for the selected Service/Equipment will be displayed underneath the Item Information section. The UDFs for the Service can be changed as needed from this tab. These changes will be reflected on the Service or Equipment that is selected in the Item Information section.
Data Entry Form - Tabs
When on the Incident Form, the tabs are displayed immediately below the input fields in the data entry form. By accessing these tabs, Users can see all the associated data that is related to the Incident and edit the data that is specific to the Incident. The 'Tabs' associated with Incident are Reported Problem, Equipment, Workflow, Contacts, Charges, GLAs, Labor, Cabling, Activity/Remarks, Email Thread, Attachments, and User Defined Fields.
Incident Code
A key to this process is the fulfillment of the section labeled 'Incident Code', displayed on the right margin of the image above. In the field labeled 'Incident Code', select a Trouble Code from a default list of possible Trouble Codes generated by the User's organization. This list is updated and repopulated with more specific options when the User selects an item from the Services/Equipment grid. 'Incident Details', meanwhile, allows the User to provide an in-depth explanation of the Incident.
Resolution Code
If the Incident has already been resolved, the User can select a 'Resolution Code' from a default list of possible Incident resolutions generated by the User's organization. Accordingly, 'Resolution Details' allows the User to provide an in-depth explanation of the Resolution.
Impact and Urgency
Users can also apply an 'Impact' designation to an Incident. While each default 'Incident Code' has an 'Impact' associated with it – in other words, how many people will be affected by the Incident, or how important the Incident is considered to be – Users can also apply 'Impact' levels to individual Incidents in the Service Desk. Users can set the item's 'Impact' level to 'High', 'Medium', or 'Low'.
Similar to Impact, Users can also apply an Urgency designation to an Incident. Urgency refers to the priority the Incident should be given. A default ‘Urgency’ will be loaded if the owner of the Incident is a VIP. Users can also manually set the item’s ‘Urgency’ level to ‘High’, ‘Medium’, or ‘Low’.
Once all required data fields have been fulfilled and the Incident has been satisfactorily described, click the
When the Incident is first saved, any associated equipment and recurring charges for that service or equipment will be loaded into the equipment and charges tabs respectively. If any of the equipment on a Service has monthly recurring charges those will be imported as well. For an incident on a piece of equipment, the child equipment charges will be imported.
Equipment
Now that the User has defined which Service or Equipment has an issue, the User can designate a host of resources and procedures that will direct the process moving forward.
For an Incident, new Equipment can be added to the Service or Equipment with the problem, and existing Equipment may be removed, repaired, or replaced:
When Equipment is removed, all recurring charges associated with the Equipment will be stopped on the finalization date of the Incident.
When Equipment is repaired, it will be moved to the Warehouse for repair, but the association to the Service will remain.
When replacing Equipment, it will remove the old Equipment, associate the new Equipment with the Service, and then stop the recurring charges on the replaced Equipment and recreate the Charges on the new Equipment.
For example, under the 'Equipment' tab, users can select pieces of equipment from the Equipment Catalog that are required in order to complete the incident.
Add Equipment To add a piece of Equipment to an Incident, simply select the 'Equipment' tab and click the
button located on the Grid Toolbar of the Incident Equipment grid that appears in the tab. In the data entry form (see "Equipment Form" image above), select a piece of Equipment from the Equipment Catalog and specify two critical locations: where the Equipment is coming from (From Warehouse) and to where it is going (To Location). Click the button at the bottom of the data entry form, and the Equipment will appear in the original grid in the 'Equipment' tab.
Remove Equipment To remove a piece of Equipment on an Incident, simply select the 'Equipment' tab, select a piece of Equipment and click the 'Edit' button located on the Grid Toolbar of the Incident Equipment grid that appears in the tab. In the data entry form (see "Equipment Form" image above), select the "Remove" action and choose the Warehouse Location where it is going (To Warehouse). Click the
 button at the bottom of the data entry form, and the Equipment will appear with a status of "Remove" in the grid on the 'Equipment' tab.
Replace Equipment To replace a piece of Equipment on the Incident, simply select the 'Equipment' tab and click the
button located on the Grid Toolbar of the Incident Equipment grid that appears in the tab. In the data entry form (see "Equipment Form" image below), select a piece of Equipment from the Equipment Catalog (the Equipment Catalog MUST be the same as the Equipment to be replaced). Select the Equipment to be replaced by clicking in the "Replaced Equipment" field and selecting the Equipment. Only Equipment associated with the Service that matches the selected Equipment Catalog will be shown in the results. Click the
*Note: Equipment that has been marked as "Consumed" or is restricted because of the Location and Catalog restrictions set on the Equipment Catalog can NOT be selected for replacement.
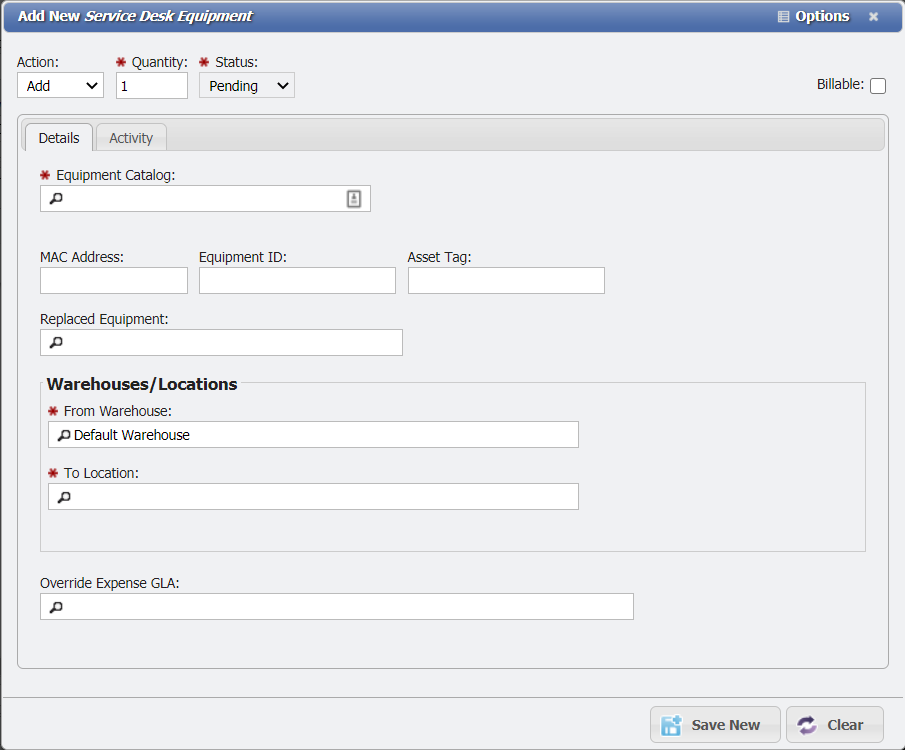
Add new Service Desk Equipment example
Cabling
From a Service Desk Incident, the Cable Path may be edited in real time. This is the same as editing the Cable Path directly from Cabling tab on the Service. To edit a Cable Path(s) highlight the Cable Path(s) that need to be edited and click the
*NOTE: If a Cable Path is changed on Incident, an Activity Record is added to Service Desk.
View Path
Another Cabling function that can be accessed from a Service Desk Incident is the ability to View the Cable Path. Viewing the Cable Path(s) allows a User to view the entire Cable Path, or parts of a Path to verify the correct Equipment and Cables are in their proper places and is labeled properly. To View a Cable Path(s) highlight the Cable Path(s) that a User wants to View and click on the
GLA Usage on Incidents
GLAs when used on an Incident behave slightly differently than on other Service Desk Items, such as Service Orders.
The GLA on the Service or Equipment will be pulled into the Incident by default.
Changing the GLA will allow for any Labor or other Non-Recurring Charges to be Billed to a different GLA than the default GLA on the Service or Equipment.
Completion / Finalization of the Incident will NOT alter the GLA of the Service / Equipment.