Inventory - Ports/Pins/Lens
Ports/Pins/Lens Equipment Grid
Users can navigate to the 'Ports/Pins/Lens (PPL) Equipment grid' by following this path: Main > Inventory > Equipment > Ports/Pins/Lens. If a piece of Equipment has an Equipment Catalog that has the Cabling Equipment flag checked, then it will also have a tab labelled Ports/Pins/Lens. This shows all PPL originating from the equipment and to the equipment (if any) to which each PPL is connected. From this tab new PPLs may be added, edited, or removed. PCR-360 provides functionality for bulk PPL creation, editing, removal, copying, and transferring of PPL. PPL records can be directly modified on a specific Cabling Equipment record. These modifications will be consistent with the other rules of editing PPL records.
Equipment PPL Tab
Add
More information on the
Ranges
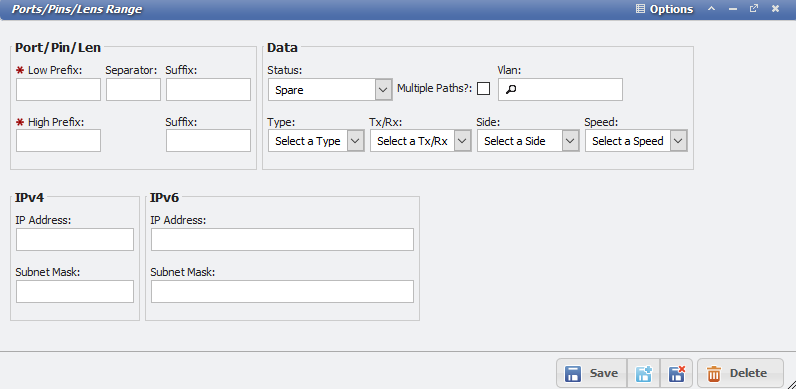
Ports/Pins/Lens Range Form
The 
Assuming a prefix Range of 1-3, a separator of " - ", and a low to high suffix of 1-5 the User would be adding 15 records with the
Example Ports/Pins/Lens | Suffix of '1' | Suffix of '2' | Suffix of '3' | Suffix of '4' | Suffix of '5' |
|---|---|---|---|---|---|
Prefix of '1' | 1-1 | 1-2 | 1-3 | 1-4 | 1-5 |
Prefix of '2' | 2-1 | 2-2 | 2-3 | 2-4 | 2-5 |
Prefix of '3' | 3-1 | 3-2 | 3-3 | 3-4 | 3-5 |
The 'Ranges' is more than a simple Add form, however, and will allow the User to edit multiple PPL. If after adding the above table the User were to click the Ranges button again and enter a prefix of 2-3, and a suffix of 1-1 they would select the 2-1 and 3-1 PPL for editing. This functionality allows the User to quickly Add and assign status' to multiple PPL.
Back Connect Ranges
The PPL Range form allows for Back-Connect Ranges. Below is the add new "Ranges" form from the Port/Pins/Lens grid on any Cabling Equipment. To use this feature, the user just needs to enter the Destination Equipment and designate a low prefix to a low suffix range to be added. This functionality allows the User to quickly connect multiple pieces of Equipment together, without having the connection appear in the Cable Path. When ports are transferred, any back connects are transferred along with the port.
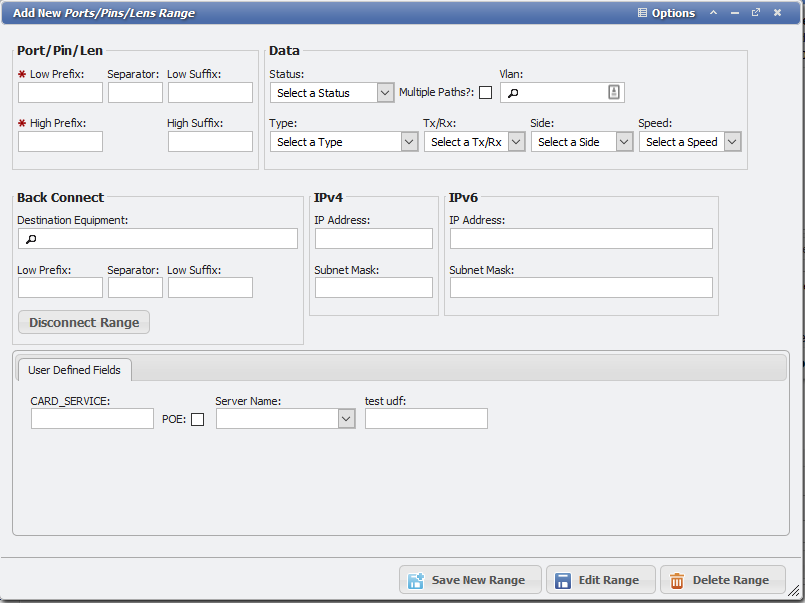
Add new, ports, pins, lens range form
Copy
The 
Transfer Range
The 
To Transfer a PPL Range, follow these steps:
Click the
button.This will open the 'Add New Select Equipment and Range to TRANSFER (move) the Ports/Pins/Lens' form. (PPL Range Transfer Form for short.)
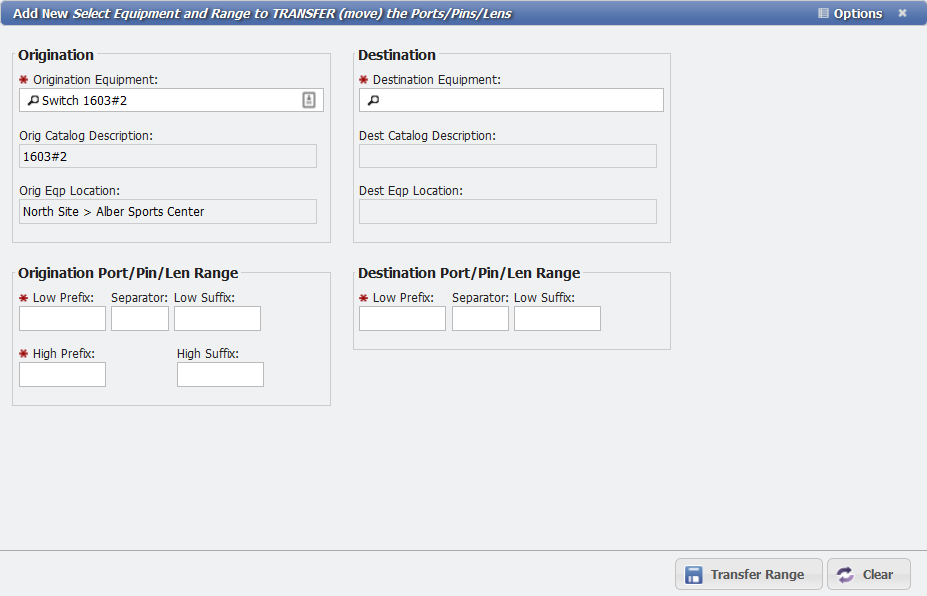
Transfer PPL Range Form
The Origination Equipment picker will automatically fill in with the Equipment from the open Equipment form.
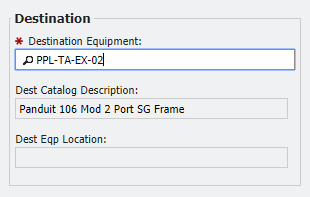
Click the Destination Equipment picker and select the Equipment that the PPL need to be transferred to.
Be sure to select a Destination piece of Equipment that is different from the Origination Equipment.
Destination Fields
Select the Origination Port/Pin/Len Range.
Enter (at minimum) Low Prefix and High Prefix of the PPL records that should be selected to Transfer.
Origination fields
Separator, Low Suffix, and High Suffix are optional fields that increase the flexibility of ranges.
This needs to specify the proper format for the PP. Generally, this format is based on the organization's naming conventions.
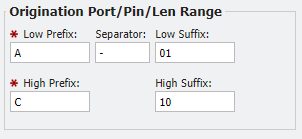
For example, the range shown above represents Low PPL named A-01 with a range of 30 ports ending on C-10.
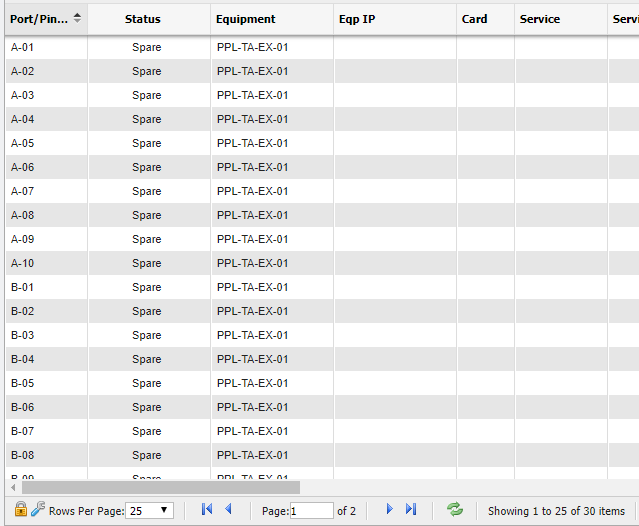
PPL Grid example
Select the Destination Port/Pin/Len (PPL) Range.
Enter (at minimum) the Low Prefix of the port range the newly transferred PPLs will start at.

Destination PPL Range fields
Separator and Low Suffix are optional fields that increase the flexibility of ranges.
This needs to specify the proper format for the PP. Generally, this format is based on the organization's naming conventions.
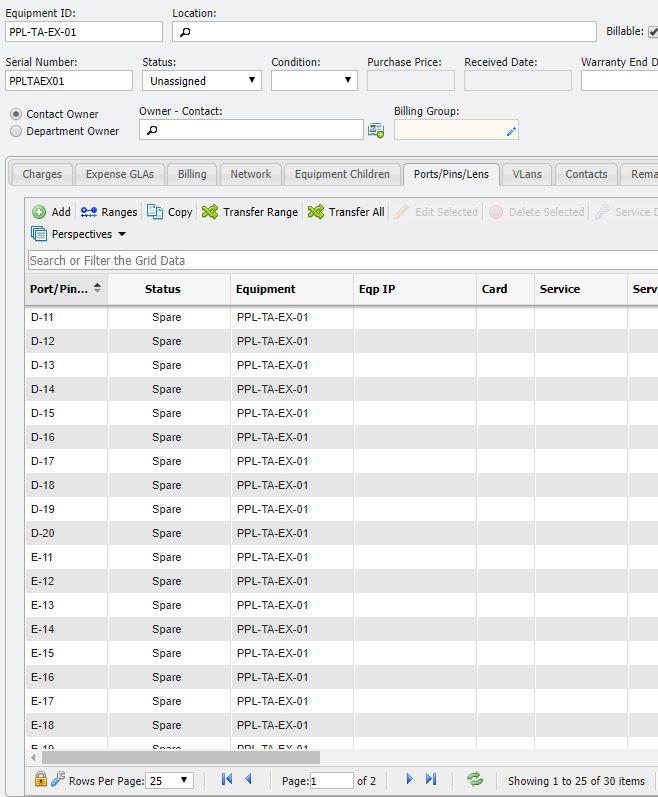
For example, the range is shown above (in conjunction with the Origination Range) represents Low PPL named D-11 with a range of 30 ports ending on F-20.
Click the Transfer Range button to complete the transfer.
The selected range will be transferred to the Destination Equipment with the specified new starting port.
Transfer All
The 
To transfer all PPLs on Equipment, use the following steps.
Click the
button.The Origination Equipment picker will automatically fill in with the Equipment from the open Equipment form.
Select the Destination Equipment Using the picker
Click the
 button to complete the transfer
 All PPLs will be transferred, as is, to the Destination Equipment.
Equipment Form example
If a User has attempted to Transfer Child Equipment PPL during the
Child Equipment PPL warning message
Edit Selected
The 
Delete Selected
The 
Service Desk
The 
View Path
The
 button will open up the Cable: View Path report that the given Ports/Pins/Lens record appears on.
For a Ports/Pins/Lens record to have a Path associated with it it must first have a Status of Assigned.
More Information about Paths and the report is available here.
Renumber
Users can quickly renumber Ports/Pins/Lens (PPL) with the Transfer form.
Click the
button.This will open the 'Add new Select Equipment and Range to Transfer (move) the Ports/Pins/Lens' form. (Transfer PPL form for short.)
Transfer Range Form example
The 'Origination Equipment' picker will automatically fill in with the Equipment from the open Equipment form.
Click the 'Destination Equipment' picker and select the Equipment that the PPL has to transfer to.
Select a Destination piece of Equipment that is the same Equipment as the Origination Equipment.
Select the Origination Port/Pin/Len Range.
Enter the Low PPL of the PPL records that should be selected to Transfer. This needs to include the proper format for the PPL based on the organizations naming conventions. For example, if the Low PPL is named "123-ABC" where "-" is the separator, then the formatting should look like this: Low Separator: "123", Separator: "-", Low Suffix: "ABC".

Low PPL fields
Enter the High PPL of the PPL records that should be selected to Transfer. This needs to include the proper format for the PPL based on the organizations naming conventions. For example, if the High PPL is named "124-ABZ" where "-" is the separator, then the formatting should look like this: High Separator: "124", and High Suffix: "ABZ".
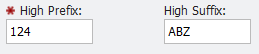
High PPL fields
Click the
 button.
The selected Range will be renumbered and remain on the original Equipment record since the Origination Equipment and Destination Equipment fields match.