A Workgroup is a collection of employees working together to achieve a common goal. The nature of the goal can be project-specific – for example, a team of employees collaborating on a Service Desk item – or by function, such as Telecom, Programming, etc.
Navigate to Main > People > Workgroups to open the Workgroups Grid.
To add a new Workgroup to the Grid, click the Add button immediately above the Grid.
In the Workgroup data entry form, the User is prompted to define a number of fields. The Workgroup Name is the first required field.
Each Workgroup is assigned a Manager to oversee the group's operations. To select a Manager, click on the Search Icon in the Manager data field and select a Contact from the Workers/Contacts list. (Note: Only Contacts with the Worker type are selectable as Managers.)
Optional fields include Charge Catalog, Location Permissions, and Escalation Sequences.
Note: For more information on Escalation Sequences, see the 'Admin'.
Of course, the key components of any Workgroup are the employees with which it is associated. To add members to the new Workgroup, use the tab labeled Workers & Rates.
To add a new Workgroup member, click the Add button immediately above the Grid displayed in the Workers & Rates tab.
In the Add New Worker form, the User is first prompted to select a Worker from the Workers/Contacts drop-down list. The User must then define the Worker's 'Hourly Rates'. Once all defined fields have been satisfied, click Save New button at the bottom of the form. The new Worker appears on the Grid displayed in the Workers & Rates tab of the Workgroup data entry form.
Note: All Contacts added as a Worker to a Workgroup are automatically given the 'Worker' contact type, assuming that the Contact does not already have the 'Worker' type.
Users can add as many Workers to a Workgroup as desired.
Once all required fields in the Workgroup data entry form have been satisfied, click the Save New button at the bottom of the form. The new Workgroup appears on the original Workgroups Grid.
Editing a Workgroup
Users can edit any item on the Workgroups grid by double-clicking the item or highlighting and clicking the Edit Selected button immediately above the Grid. This action opens the Workgroup's data entry form where edits can be made and saved.
Deleting a Workgroup
Users can delete items from the Workgroups Grid by clicking on an item and pressing the Delete Selected button immediately above the Grid.
Keep in mind that not all Workgroups can be deleted. A Workgroup can only be deleted if all the Workers assigned to it are associated with at least one other Workgroup.
Using Notifications for Workgroup Alerts
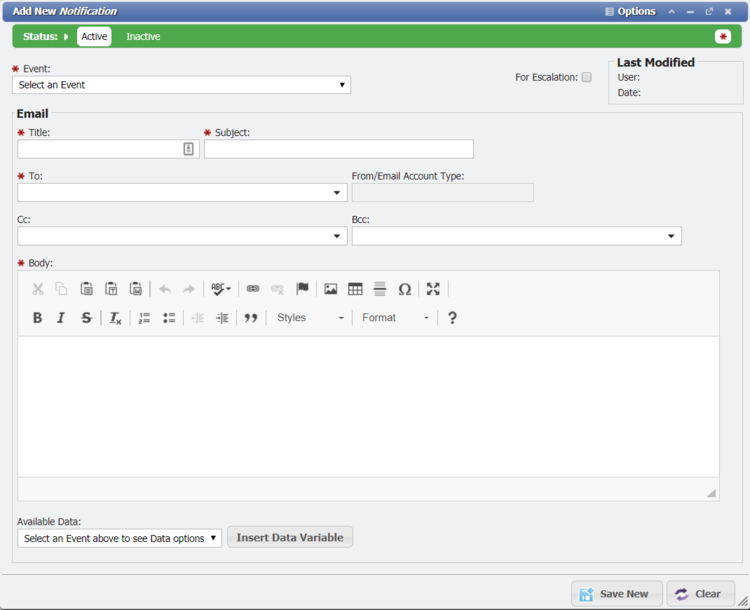
Navigate to "Admin > Escalations/Notifications > Notifications".
Click on the 'Notifications Grid'.
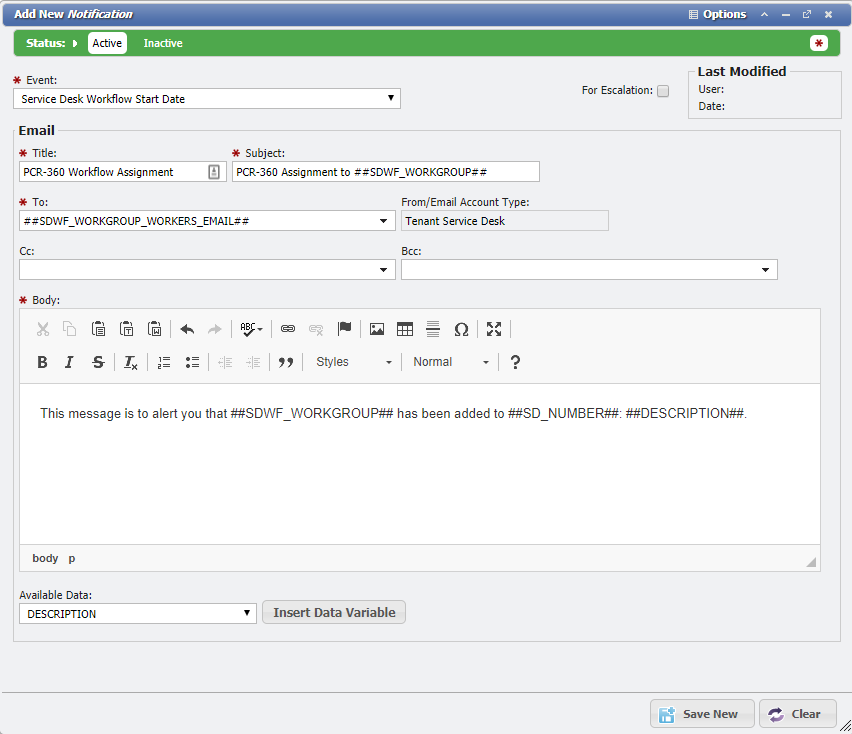
Setup the Notification with the following criteria:
Event: Service Desk Workflow Start Date
Title: PCR-360 Workflow Assignment
Subject: PCR-360 Assignment to ##SDWF_WORKGROUP##
To: ##SDWF_WORKGROUP_WORKERS_EMAIL##
A different variable can be used to set who should be notified, if only the Manager (##SDWF_WORKGROUP_MANAGER##) or other individual needs to be notified instead of all Workgroup members.
Personalize the Notification in the Body
sample of completed Notification
Click
to save the Notification.
Whenever a Workgroup is Assigned to a Service Desk Item, all members of that Workgroup will be sent a message informing them of that fact.
Note:If the Workgroup is updated within Service Desk to a different Workgroup, the new Workgroup will not be sent a message alerting them of the assignment.
When changing the Workgroup on a Workflow, it is recommended to deleted the current Workflow, and add a new one for the newly desired Workgroup, so that the new Workgroup can be alerted to the assignment.
Using Notifications and Escalations to Target Workgroups for Alerts
Navigate to "Admin > Escalations/Notifications > Notifications".
Click on the 'Notifications Grid'.
Setup the Notification with the following criteria:
Check the box for: For Escalation
Event: Service Desk Workflow Added
Title: PCR-360 Workflow Assignment (Escalation)
Subject: PCR-360 Assignment to ##SDWF_WORKGROUP##
To: ##SDWF_WORKGROUP_WORKERS_EMAIL##
A different variable can be use to set who should be notified, if only the Manager (##SDWF_WORKGROUP_MANAGER##) or other individual needs to be notified instead of all Workgroup members.
Personalize the Notification in the Body
Click
to save the Notification.
Navigate to "Admin > Escalations/Notifications > Escalations".
Click on the 'Sequence Grid'.
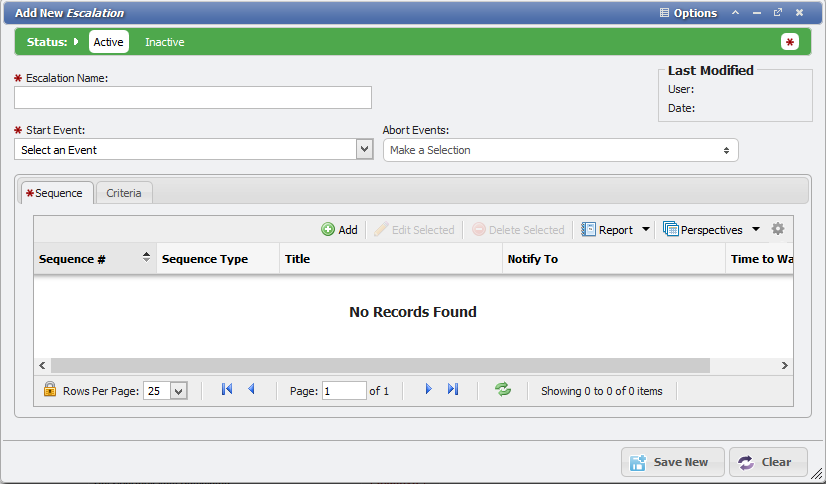
Add New Escalation Form example
Setup the Escalation with the following criteria:
Start Event: Service Desk Workflow Added (per the Notification setup previously)
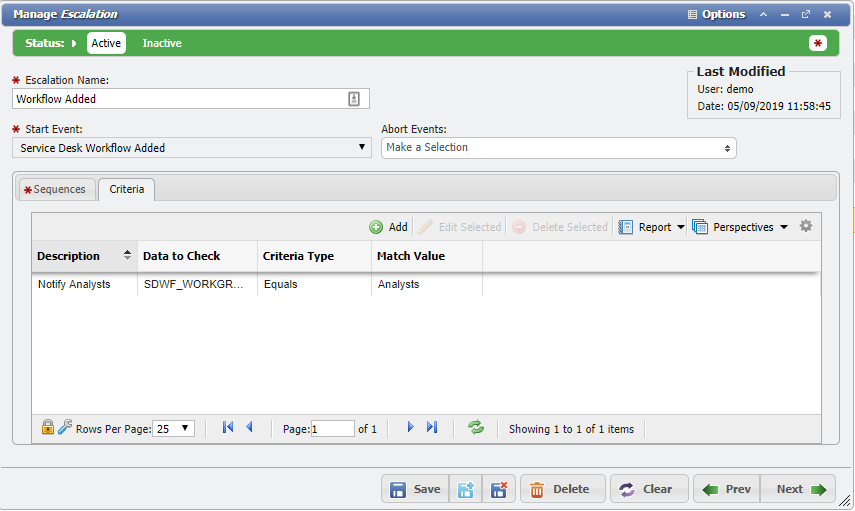
Escalation Name: Workflow Added
Click
to save the Escalation.
Set the Status to
.
Add a 'Sequence' to the Escalation by clicking on the 'Sequence Grid'.
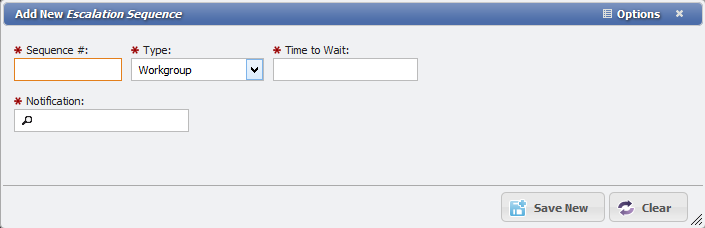
Escalation Sequence form example
Setup the Escalation Sequence with the following criteria:
Type: Workgroup
Time to Wait: desired delay before the Notification is sent
Sequence #: desired sequence number
Notification: PCR-360 Workflow Assignment (Escalation) (per the Notification setup previously)
Click
to save the Escalation Sequence.
Go to the 'Criteria' tab on the Escalation form.
Click on the 'Criteria Grid'.
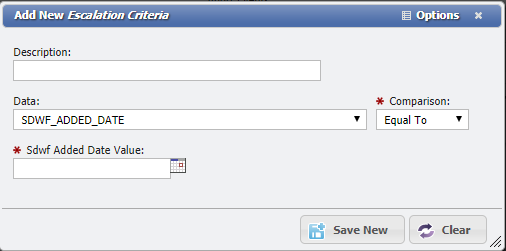
Escalation Criteria form example
Define Criteria for what Workgroups should receive the message.
Setup the Escalation Criteria with the following values:
Description: detail of what the criteria is doing
Data: SDWF_WORKGROUP
Comparison: Equals
Sdwf Workgroup Value: Select the desired Workgroup
Click
to save the Escalation Criteria.
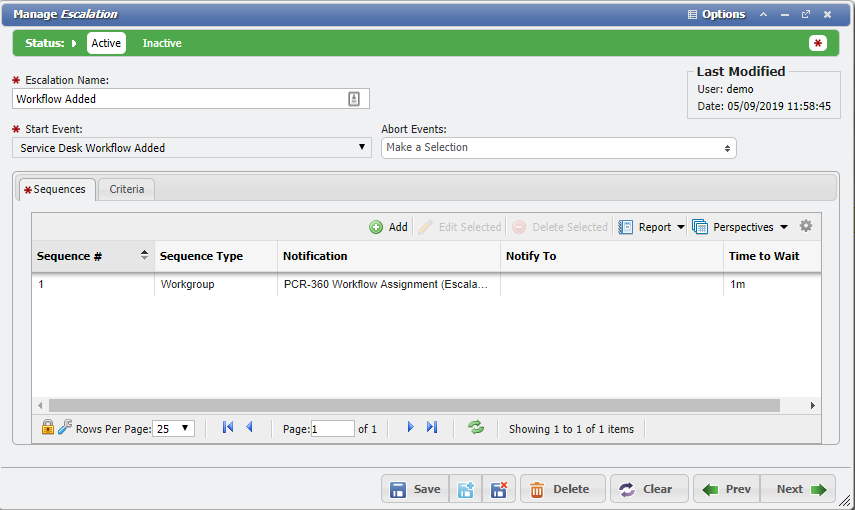
The Escalation should look as follows:
Whenever a Workgroup that matches the Criteria is Assigned to a Service Desk Item, all members of that Workgroup will be sent a message informing them of that fact.
Note:If the Workgroup is updated within Service Desk to a different Workgroup, the new Workgroup will not be sent a message alerting them of the assignment.
When changing the Workgroup on a Workflow, it is recommended to deleted the current Workflow, and add a new one for the newly desired Workgroup, so that the new Workgroup can be alerted to the assignment.
Default Workgroup Rates
When a Workgroup is added, either by selecting a Worker or adding the Workgroup, the Rate will automatically populate based off the value defined by the Workgroup.
Charge Catalog
The Charge Catalog picker controls the type of Charge to be used for each Workgroup. Setting the Charge Catalog on the Workgroup allows the User to track the Labor separately based on the Workgroup.
 on the 'Notifications Grid'.