Widgets
Adding System Widgets
There are five System Widgets that can appear in the left and right panes by default. Unlike Custom Widgets or Graphs these Widgets cannot be edited and are maintained as the standard Widgets by PCR.
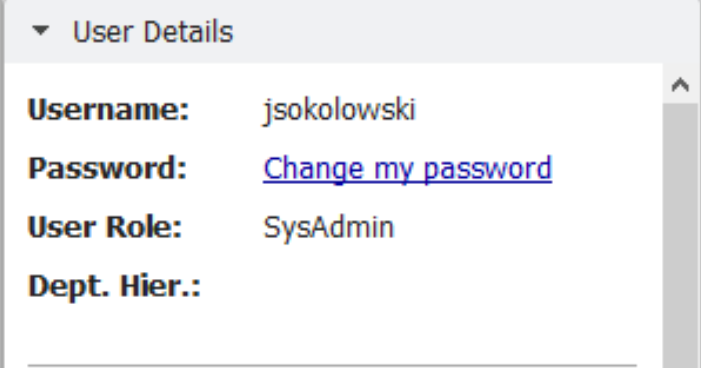
'User Details' - Provides relevant User information like User Name, Change Password link, User Role(s), Dept Hierarchy, Name, Phone, Email, and Address. There is also a log of the last 10 login attempts.
'Messages' - System messages generated by the Notifications and Escalations will appear here as well as any messages from running batch processes.
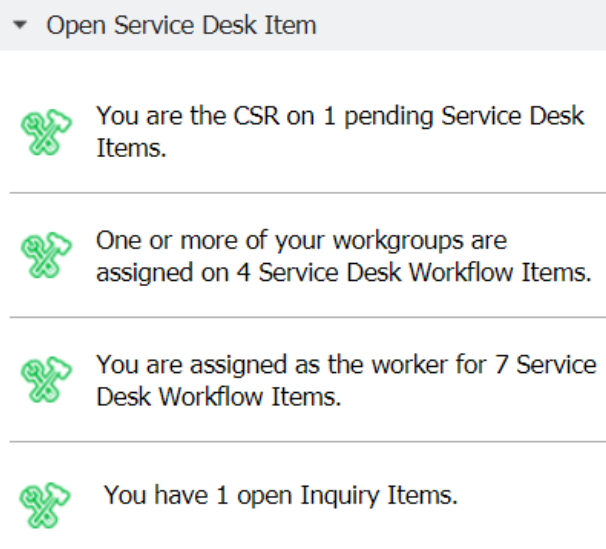
'Open Service Desk Item' - Any Service Desk items that are assigned to the User will appear here. These appear in four groups; The first three are Service Rep, Workgroup, and Assigned Workflow and can be clicked to automatically navigate to their respective sections in the My Service Desk space. The last is Assigned Requests, and when clicked on will automatically navigate to the Requests grid.
'News' - Provides the listing of all the News the Admin has determined was important for the User to know.
'Google' - Provides a Google Search bar that a User can quickly access and search for information using Google. Clicking 'Google Search' will open the search requested in a new tab.
There is an additional System Widget that DOES NOT appear by default. The following Widget is known to be a resource hog and may have an adverse effect on the speed of PCR-360 when viewing the Landing Page or Dashboard. For this reason, the 'Status' is set to Inactive by default, though it can be turned on.
'Recent Activity' - Provides a history of any Recent changes in the data across all grids.
An Admin can add additional System Widgets that can be set to appear by default.
To add System Widget(s) to the Dashboard just follow these steps:
From the Dashboard click the
 button.
This will unveil a selection of buttons, click the
 button.
The 'Manage Existing Widget' form will open. Select the Widget desired.
Note: Any Widgets already added will not appear here, as they are on the page already.The Widget will be added to the Dashboard. Position it in whichever of the four panes that are desired, though only the left and right panes are generally recommended.
Click the
 button.
The Widget(s) should now display on the Dashboard.
Adding Custom Widget/Chart
There are a number of Widgets that a User can add for a better overhead view of data in PCR-360. Users are encouraged to add widgets to their Landing Page or Dashboard to enable instant access to relevant or regularly visited websites.
From the Dashboard click the
 button.
This will unveil a selection of buttons, click the
 button.
The 'Manage Add a Customer Widget' form will open. Select the Widget desired.
Note: To see a a full run down of all the available Widgets, navigate to the Custom Widgets/Charts page .The Widget will be added to the Dashboard. Position it in whichever of the four panes that are desired, though only the bottom three are generally recommended.
Click the
 button.
The Widget should now display on the Dashboard.
Moving a Widget
A widget can be moved within the provided panes on both the Landing Page and Dashboard.
From the Dashboard click the
 button.
The Widgets already on the Dashboard will now have a dashed line around them.
Click and drag the Widget to the Pane that is desired.
Click the
 button.
The Widget will now display in its new location.
Removing a Widget
Any Widget, including system Widgets, can be removed. They can be added back later if so desired.
From the Dashboard click the
 button.
The Widgets already on the Dashboard will now have a dashed line around them.
Click the 'X' (Delete Widget) button.

Click the
 button.
The Widget should now have been removed from the Dashboard
Landing Page vs. Dashboard Widgets
Widgets are available to the User on both the Landing Page and the 'Dashboard'. Widgets on the Landing Page should look identical to Widgets on the Dashboard. The main difference is that the Widgets on the Landing Page can be set to appear on the page by default by an Admin.
Open Service Desk Item Widget

There are four different types of messages that are displayed in the Open Service Desk Item widget:
You are the CSR on # pending/hold Service Desk Item/Items This message's detail comes from Main > Service Desk > My Service Desk > Service Rep. This message indicates how many Service Desk Items you are listed as the Customer Service Representative for. Clicking this selection will open the My Service Desk: Service Rep Grid.
You are assigned as the worker for # Service Desk Workflow Item/Items This message's detail comes from Main > Service Desk > My Service Desk > Assigned Workflow. This message indicates how many Service Desk Items you are assigned as a Worker for. Clicking this selection will open the My Service Desk: Workgroup Grid.
One or more of your workgroups are assigned on # Service Desk Workflow Item/Items This message's detail comes from Main > Service Desk > My Service Desk > Workgroup. This message indicates how many Workflows you are assigned to are on Service Desk Items. Clicking this selection will open the My Service Desk: Assigned Workgroup Grid.
You have # open Inquiry Item/Items This message's detail comes from Main > Service Desk > Requests. This message indicates how many open Inquires you are assigned to. Clicking this selection will open the Requests Grid.
For more details on Service Desk Items, please see: My Service Desk .
User Details Widget
The 'User Details Widget' is a System Widget that contains all the relevant information in reference to the currently logged in User. There are several critical pieces of information here that the User can access.
Change my password

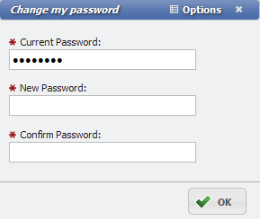
To change a password, the User needs to click the 'Change my password' link. Clicking the link will open the 'Change my password' form.

The 'Current Password' will be hidden from view with bullets. The User can then enter the 'New Password', and must then enter the 'Confirm Password'.
Once the Password is entered, the User can click the ![]() button and the password will be set for the User.
button and the password will be set for the User.
Users are limited in how often they can change their password by the Configuration Option 'AUTH_PWD_CHANGE_LIMIT' .
Messages Widget
The 'Messages Widget' will display all of the unread messages that a User has assigned to them by the Events system. From the Messages widget, the User should be able to see all of the messages that were created and these Messages are the same messages that the User can view in the Message grid, or on the Message email icon.
The ![]() button will take the User to the People > Messages grid where they can review any Messages sent to the User.
button will take the User to the People > Messages grid where they can review any Messages sent to the User.
The New Message button will open the 'Add New Message' form. From here the User can send an internal message or email to any other User.
Individual messages can be opened by clicking on them.
Recent Activity Widget
The 'Recent Activity' widget shows a grid of all the most recent changes to records. This is very similar to the Audit grid, in that it shows changes to records. Users can select any of the archived tables from the widget, but they cannot effect the records in anyway.
News Widget
The News widget will display any of the News items that a User has access to see in this widget when they login to the application. The News items will display the Title and Summary from the News item. Users can click the specific item and will get to see the details from the Content of the News item in the dialog that opens.
Safe mode
On the Landing Page or Dashboard occasionally a Widget that was added will slow performances, freeze up the page, or just crash altogether. This is most often the result of conflicting programming code from external websites. In order to provide a remedy for these issues PCR-360 provides a 'Safe mode'. Activating it will disable iframes and allow the offending Widget(s) to be removed/edited to restore normal functionality. Safe mode has no effect on the default PCR-360 System Widgets. However, any Custom System Widgets will be effected by 'Safe mode'
Landing Page
To activate 'Safe mode' on the landing page simply add the text in quotes to your PCR-360 URL "/safemode". Example:pcr360.com/safemode
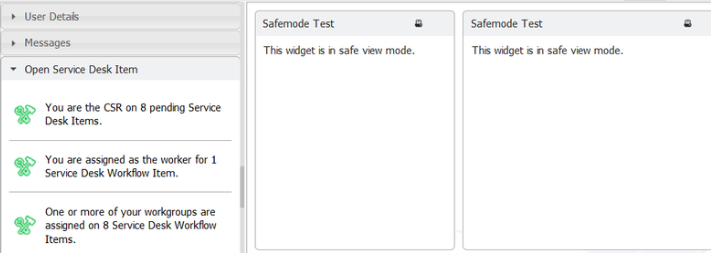
Once loaded any active Widgets on the page will be in Safe mode. Click 'Configure' to modify them and/or remove the offending Widget. The following is an example of Widgets in Safe mode:

Dashboard
Activating 'Safe mode' on the Dashboard is similar to the Landing Page. Add the text in quotes to your PCR-360 URL; "safemode/dashboard
