To Export a file, Users must first add the file as an item on the Export Files grid. Click the button located on the Grid Toolbar above the Export Files grid.
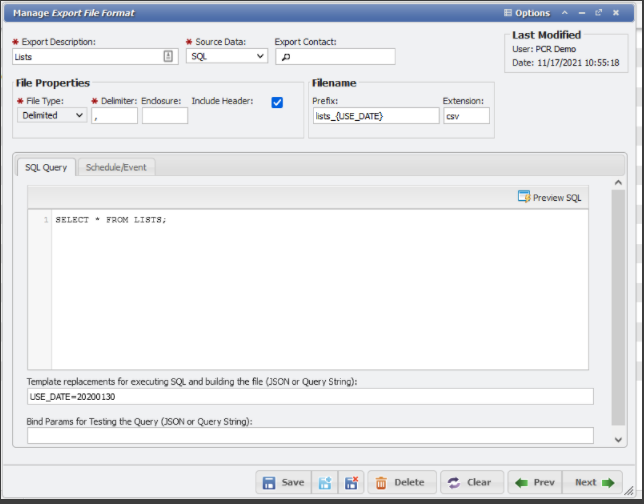
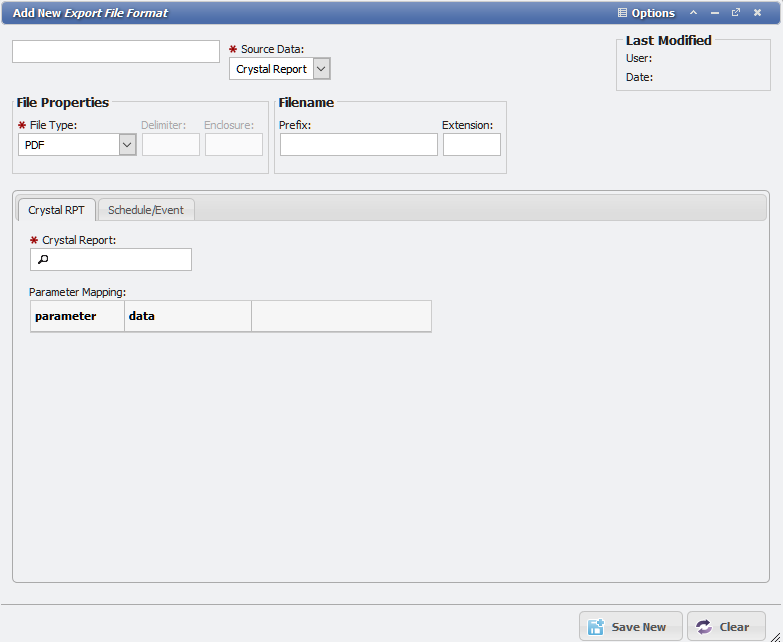
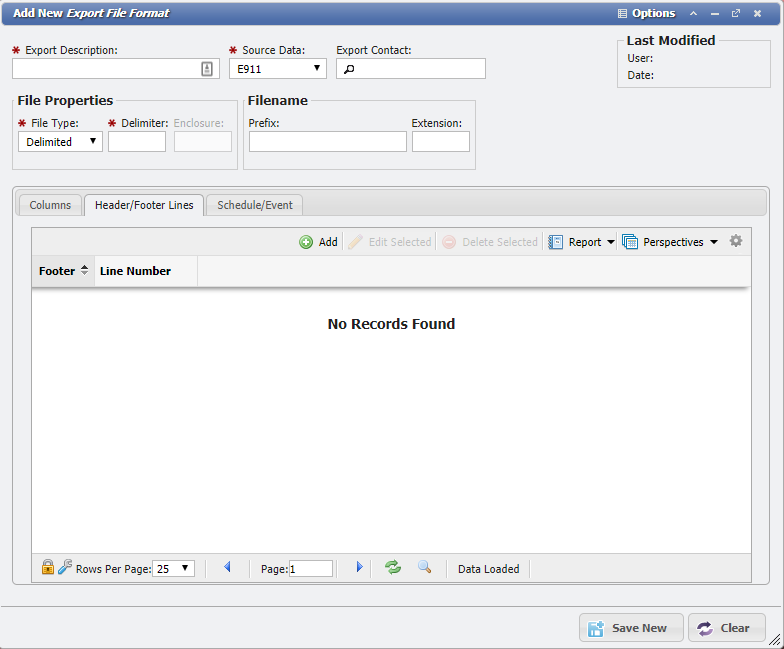
Add New Export File Format form example
In the data entry form, the User must define a number of required fields.
First, enter a brief 'Description' to make the file easily identifiable. This 'Description' field is what will show in the Grid after the User saves the 'Add New Export File Format' form. Next, in the 'Source Data' field, the User must specify the 'Source Data' that they are exporting. Each type of 'Source Data' will alter the form's 'File Properties' section to require the desired information for the given Source.
Users can also define the name of the Export File to be created. The 'Prefix' field represents the file's basic name while the 'Extension' field defines the file type (such as csv, txt, xls, etc).
There are three types of 'Source Data': the 'SQL', 'E911', and 'Crystal Report'.
Manually Exporting a File
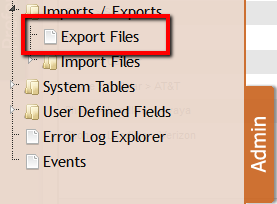
Navigate to the Export Files grid by opening the 'Admin' tab and clicking on the node labeled 'File Management'.
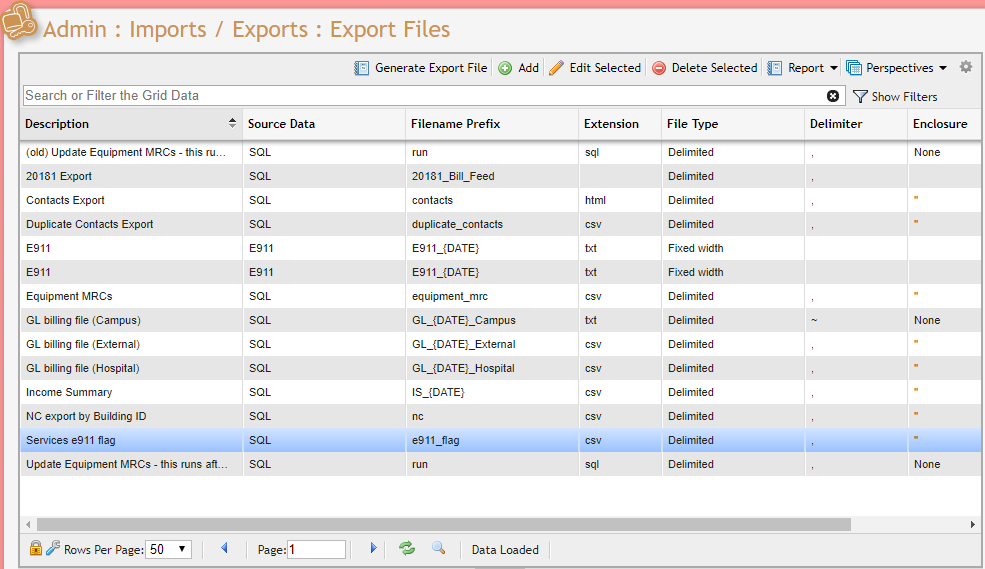
Click on the node labeled 'Export Files'. Admin > Imports/Exports > Export Files
Click the row containing the information that is desired for the export.
Click the button.
The button will allow viewing of the selected Export File and the button will download the selected Export File.
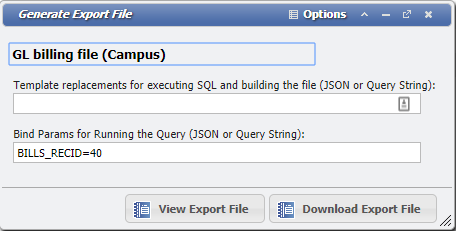
Generate Export File form example
The 'Template replacements for executing SQL and build the file' field is used for changing and replacing parts of an SQL Query in the fields.
The 'Bind Params for Running the Query' field is used for defining variables in the query in the fields
Scheduling Exports
Manage Import Event
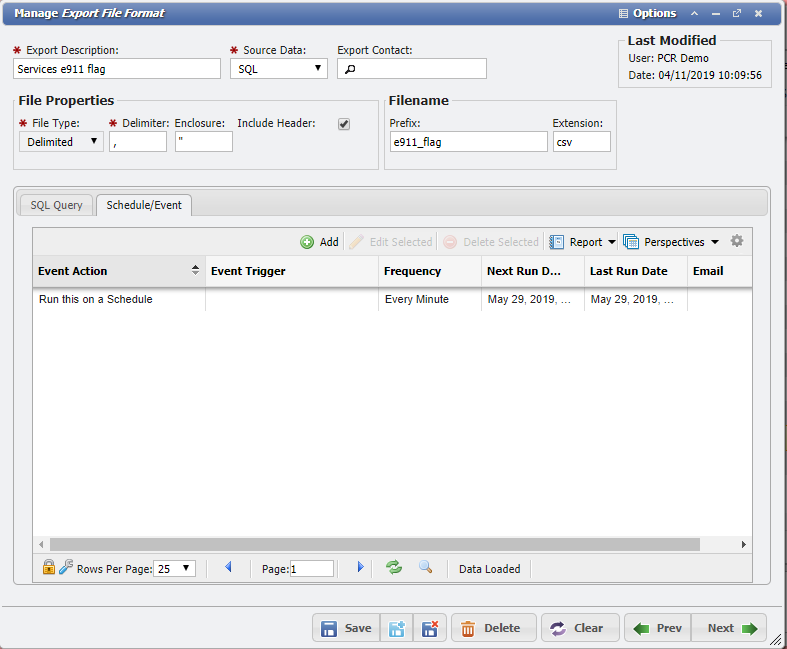
Users are able to schedule Export Files.
From the Export Files grid, open the desired Export and select the 'Schedule/Event' tab.
Click the button on the Schedule/Event grid.
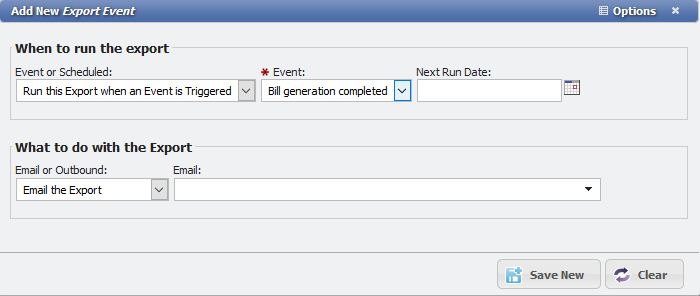
This will open the 'Add New Export Event' form.
Add New Export Event form
Select either an Event or a Schedule as the trigger to Export the file on the 'Event or Scheduled' drop down.
The 'Next Run Date' field is used for setting the exact Date and Time for the Schedule.
If a 'Schedule' is desired, the User must then specify both the 'Frequency' of the Export.
Frequencies range between 'Every Minute' and 'Yearly'.
Exports can also be set to trigger whenever a 'Bill' has been generated, with the 'Run this Export when an Event is Triggered' option.
Finally, the User must select the method for the Export.
'Email': the exported file will be emailed to the Email address provided in the 'Email' field.
'Outbound': the exported file will be placed in the Outbound Directory, where it can be accessed by other systems.
'Both Email and Outbound': the exported file will both be emailed and placed in the Outbound Directory.
Source Data - Crystal Report
Crystal Report will draw from any currently created Crystal Reports that are available. Simply click the 'Crystal Report' picker in the 'Crystal RPT' tab. A Crystal Report can be Exported as one of several desired 'File Types'; 'PDF', 'Word Document', 'Excel File', 'Rich Text File (rtf)', or 'CSV'. The Filename 'Prefix' field and 'Extension' may also be optionally selected.
Source Data - SQL
SQL Query Tab example
To Export as a SQL Query, the User must specify a Delimiter and optionally specify the Enclosure. The Filename 'Prefix' field and 'Extension' may also be optionally selected. These will set the name of the file after it is Exported. SQL must be entered manually as a SQL Query in the 'SQL Query' tab. SQL Select into File Command (MySQL Only) allows you to set the SQL query to a file on the server. This is good if you need to view a lot of data that is limited by Adhoc and Import limitations.
Note: Contact PCR if your Organization is on Oracle DB, for help getting a query.
Source Data - E911
An E911 file can be exported as one of three different 'File Types': Fixed Width, Delimited, or Crystal Report.
When Exporting an 'E911' file, there are three tabs of information to be considered: Columns, Header/Footer Lines, and Schedule/Event.
Columns
In the tab labeled 'Columns', the User can define which columns of data populate the file. To add a column of data, press the 'Add' button located on the Grid Toolbar above the Columns Grid.
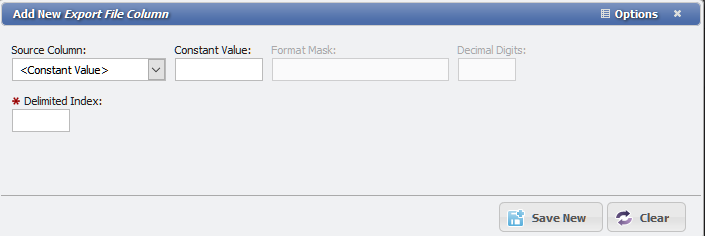
Add New Export File Column form example
In the form, Users can select the desired column of data in the field labeled 'Source Column'. The options listed in the 'Source Column' field depend on the User's selection of 'Source Data'. For example, if the User selected 'General Ledger' as the 'Source Data', the 'Source Column' field will list each column that exists on the General Ledger Grid. If the export file requires a static, repeating value in a particular column; select the Source Column option of “Constant Value”. A User can then enter that repeating value in the Constant Value field.
If the User defined the File Type as Delimited, the User must define a numeric Delimited Index. This sequence number determines the order of each column of data in the file. The column of data designated as '1', for example, appears as the first column on the new file.
If the User defined the File Type as Fixed width, the User must define both Start and Width values to determine the column's position and width in the new file.
Header/Footer Lines
Add New Export File Format
In the tab labeled 'Header/Footer Lines', the User can add either or both a 'Header' and a 'Footer' Line – representing the first and last records in the new file – to the file.
To add a header or a footer, click the button on the Grid Toolbar above the Header/Footer Lines grid. In the form, Users should first enter a 'Line Number' to determine the order of the header/footer in the case of multiple entries. If the User is adding a footer, check the box next to the 'Footer' field.
Add New Export File Header Line
Next, the User can define the column of data that will populate the new header/footer. This is similar to the ones already set on the ''Columns'' tab. To do so, follow these steps:
Click the button on the Columns grid.
This will open the 'Add New Export File Column' form.
Add New Export File Column form example
Select the Column Type from the drop down. These can be '<Constant Value>', 'Row Count', 'File Sequence', 'Column Sum', 'Current Date/Time', or 'Current Date'.
The Delimited Index field needs to be filled in as well with the
Once these required fields have been satisfied, click the button. The new header/footer will appear on the 'Headers/Footers Line' grid.
Editing a File For Export
Users can edit existing files for export by double-clicking on an item in the File Exports grid.
This opens the data entry form. Once all required fields have been fulfilled, click 'Save' to make changes permanent.
Deleting a File For Export
To delete one or more existing files for export, highlight each item to be removed and click the 'Delete Selected' button on the Grid Toolbar above the Export Files Grid.
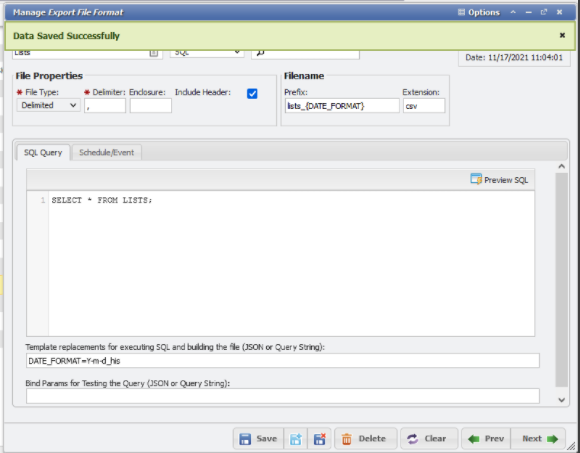
Data Formats for Exporting Files
The Filename field can accept either a DATE (Ymd) or DATETIME (Ymdhis):

 button.


 button on the Columns grid.