Best Practice - Permission Sets
Permission Sets
'Permissions' and 'Roles' are often thought of as a One to One relationship. For example, a Role of 'Admin' and a Permission Set of 'Admin'. This can mean a massive number of both that must be created if there are pieces of the application that the Administrator wishes to restrict from a User group. A more effective way of handling this is to create a Permission Set that manages a specific function and then assigning that Permission Set to the appropriate Role as needed. Said another way, Permissions are most effective when used to disallow single or small sets of items, rather than to explicitly allow all sets of an item.
For the example, the User should examine allowing a section of the application to a Role. This Role is the 'Example Role'. The 'Example Role' has a specific business role that must be controlled so the User cannot access some sections of the application but for other sections, access is desired. This 'Example Role' should have the following rules:
'Example Role' should be able to access the CustomerCenter
'Example Role' should be able to access the Knowledgebase
'Example Role' should be able to access Service Desk: Requests, however, Example Role should NOT be able to 'Delete Selected'.
'Example Role' should NOT be able to modify Requestor.
In this case, the Best Practice of Permission Sets for Example Role could have five Permissions assigned to it. By taking this incremental access approach to Permissions Sets, an Admin can guarantee that even organizations with a large number of Users only access the portions of PCR-360 that are allowed to specific User groups and management of Roles, and Permissions becomes easier in the long term. The following list of examples shows how to create these Permissions Set and end with creating the Role.
Example One - CustomerCenter Only
The first 'Permissions Set' allows access to ONLY CustomerCenter.
Navigate to Admin > User Management > Permissions Sets.
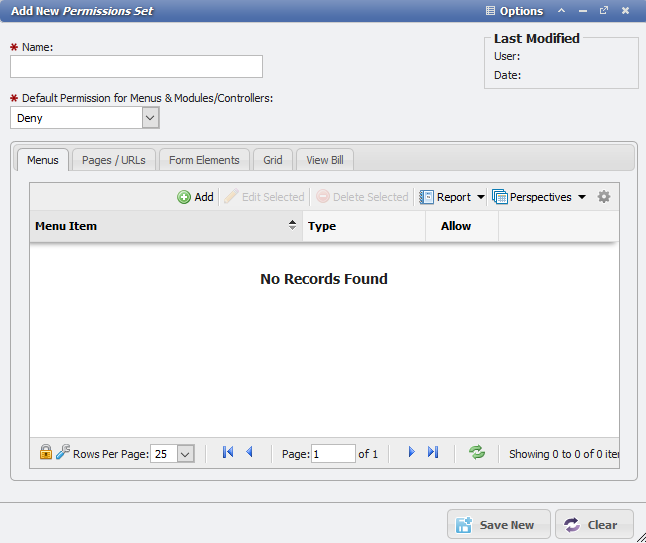
Click the 'Add' button.

Enter a 'Name' of "CustomerCenter Only".

This title lets other Users easily know the intent of the Permissions Set.
Leave the 'Default Permission for Menus & Modules/Controllers:' set to 'Deny'. This ensures access to ONLY what is added.
On the 'Menu' tab, click the 'Add' button.

This opens the 'Add New Menu Permissions' form. Click the 'CustomerCenter Menu' field.

Select 'Check all'. UNKNOWN_ATTACHMENT
Click the 'Save' button.

This creates a Permission Set that only allows access to the CustomerCenter.
Note: Roles that are assigned this Permission Set are not allowed to access any other area of the application unless additional Permissions are granted.
Example Two - Knowledgebase Only
The second 'Permissions Set' allows access to ONLY CustomerCenter.
From Admin > User Management > Permissions Sets again click the 'Add' button.
Enter a 'Name' of "Knowledgebase Only".
Leave the 'Default Permission for Menus & Modules/Controllers:' set to 'Deny'. This ensures access to ONLY what is added.
On the 'Menu' tab, click the 'Add' button.
This opens the 'Add New Menu Permissions' form. Click the 'Knowledgebase' check box.
Click the 'Save' button.
This creates a Permission Set that only allows access to the Knowledgebase.
Note: Roles that are assigned this Permission Set are not allowed to access any other area of the application unless additional Permissions are granted.
Example Three - Service Desk: Requests Only
The third Permissions Set allows access to the Service Desk, but ONLY to the Requests sub menu.
From Admin > User Management > Permissions Sets again, click the 'Add' button.
Enter a 'Name' of "Service Desk: Requests Only".
Leave the 'Default Permission for Menus & Modules/Controllers:' set to 'Deny'. This ensures access to ONLY what is added.
On the 'Menu' tab, click the 'Add' button.
This opens the 'Add New Menu Permissions' form. Click the 'Service Desk' check box.
Deselect the all the check boxes in the Service Desk tree EXCEPT for the 'Requests' check box.
Click the 'Save' button.
This creates a Permission Set that only allows access to the Knowledgebase.
Note: Roles that are assigned this Permission Set are not allowed to access any other area of the application unless additional Permissions are granted.
Example Four - Service Desk: Requests (no delete)
The fourth example removes the 'Delete Selected' button ![]() from the 'Service Desk: Requests' Grid. Both the fourth and fifth examples start in the Permissions Sets Grid and move to 'Service Desk: Requests' to finish creating the specific Permissions.
from the 'Service Desk: Requests' Grid. Both the fourth and fifth examples start in the Permissions Sets Grid and move to 'Service Desk: Requests' to finish creating the specific Permissions.
From Admin > User Management > Permissions Sets again click the 'Add' button.
Enter a 'Name' of "Service Desk: Requests (no delete)",
and then click the 'Save New' button.
'Add' another Permission Set and give it a 'Name' of "Service Desk: Requests (lock requestor)",
and then click the 'Save New' button.
Now that there are two blank Permissions Sets, ("Service Desk: Requests (no delete)" and "Service Desk: Requests (lock requestor)") navigate to Main > Service Desk > Requests
To set up the fourth Permissions Set of 'Service Desk: Requests (no delete)', follow these steps:
From the 'Service Desk: Requests' Grid, locate and click the "Permissions" button
in the lower left-hand corner of the Grid.
This opens the 'Add New Grid Permissions' form.

In the 'Permission Set' field, locate and select the "Service Desk: Requests (no delete)" Permission that was set up in Step 2 above.
In the 'Button' field, locate and select "deleteButton".
Make sure the 'Permission' field is set to "Deny".
Click the 'Save New' button.
This saves the fourth Permission Set of Service Desk: Requests (no delete).
Example Five - Service Desk: Requests (lock requestor)
The fifth and final Permission Set is a little more complicated. The desire is to lock the 'Requestor' field on the Requests so that this User Role cannot modify it. This needs to be done for all three Types of Requests ('Incident Request', 'Service Request', and 'Inquiry') to be effective. To do this follow, the following steps:
Start with an Incident Request. Locate a Request in the Grid that starts with "IR" and double-click or select and click the 'Edit Selected' button.

Click the 'Options' menu,

and then click 'Permissions Builders'

in the menu.
Small 'Lock' buttons appears next to all lockable form elements. Click the one next to 'Requestor'
This opens the 'Add New Form Element Permissions' form.

In the 'Permission Set' field
locate and select the "Service Desk: Requests (lock requestor)" Permission that was set up in Step 2 of Example Four .
Make sure the 'Permission' field
is set to "Read". This keeps Users with the Role from editing the field.
Click the 'Save New' button.
That sets up the fifth and final Permission. The only step remaining is to define the Role.
Setting up 'Example Role'
To bring it all together, the User should create the Role 'Example Role'. Navigate to Admin > User Management > Roles
Click the 'Add' button.
This opens the 'Add New Role' form.

Add a name of "Example Role" in the 'Role:' field.

Add a 'Description' of what the Role does. This 'Description' shows in the Grid, and can help identify the intent of a Role.
On the 'Permissions Sets' tab,

click the 'Add Existing' button.

This opens the 'Add New Existing Permission Sets' form.
Select the five Permissions Sets ('CustomerCenter Only', 'Knowledgebase Only', 'Service Desk: Requests Only', 'Service Desk: Requests (no delete)', and 'Service Desk: Requests(lock requestor)') that were created at the begining of the Best Practices wiki.
Click the 'Save and Close' button.

The Permissions Sets are added to the Grid on the Permissions Sets tab.
Click the 'Save New' button.
The Role appears in the Grid now.

Now Users can be added to the "Example Role" and the Administrator knows that any User with a Role of "Example Role" are limited to only the sections that were set for it. Using this method of incremental Permissions Sets an Administrator can effectively and quickly manage the User Roles. For instance, now that Example Role is set with its Permissions Sets, suppose another Role is needed with only access to the CustomerCenter and Knowledgebase. It becomes a simple matter to create a new Role, "Example Role Two" and assign to it the Permissions Sets of 'CustomerCenter Only' and 'Knowledgebase' only. In this way, the previous Role of "Example Role" is unaffected by the need to create a second Role while the Admin can re-use previously created Permissions Sets.